Key Takeaways: Using Box Cloud Storage
- Box Drive, an excellent productivity tool, connects your cloud account to your desktop, letting you view files and create shared links there.
- You can share files or folders with other account holders using email or by creating a link.
- Box has plenty of third-party connections, including those for Google Workspace and MS Office.
If you’re in the market for cloud storage or looking to try a new cloud service, it’s worth considering Box. As one of the best cloud storage providers, Box comes packed with features and functionality. While Box isn’t too hard to learn, there are some unique features and workflows to navigate. We will go over all the basics of how to use Box in this article.
Box supports individuals, small teams and enterprise-sized commercial businesses. We will focus on the basics with an individual account to keep this how-to guide manageable. For those who need a business cloud storage solution, check out our Box Business review to learn more.
Even if you use Box Business, the contents of this how-to guide apply, since much of the functionality is the same.
What Is Box?
Box is a cloud storage service that competes against familiar names like Dropbox, Sync.com and Google Drive. It’s easy to upload, create, and share files and folders with Box. It also employs a variety of security measures to minimize the risk of data exposure and leaks.
For those who enjoy a built-in ecosystem of native apps, Box includes several with every account, even the free one. Additionally, Box supports most documents, no matter the file type. Box Drive is a desktop app that lets you edit files, while Box sync will mirror data stored on your account between your devices.
Getting Started With Box
To get started with Box, navigate to the Box website. Clicking the blue “get started” button takes you to the pricing page.
1. Signing Up for Box
Most business plans come with a 14-day free trial. Click the “individuals and teams” button to find the free account.
- Create a Free Account
Click the blue “sign up” button or use your Google account. If you don’t use your Google account, fill in the information to get your account created.

- Add Your Information
If you don’t use your Google account, fill in the information to get your account created. Once you verify your email address, you’ll be able to access your new Box account.

{“@context”:”https:\/\/schema.org”,”@type”:”HowTo”,”name”:”Signing Up for Box”,”description”:”These step-by-step instructions show how to sign up for Box.”,”totalTime”:”P00D01M00S”,”supply”:0,”tool”:0,”url”:”https:\/\/www.cloudwards.net\/how-to-use-box\/#signing-up-for-box”,”image”:{“@type”:”ImageObject”,”inLanguage”:”en-US”,”url”:”https:\/\/www.cloudwards.net\/wp-content\/uploads\/2023\/06\/How-to-use-box.png”},”step”:[{“@type”:”HowToStep”,”name”:”Create a Free Account”,”position”:1,”url”:”https:\/\/www.cloudwards.net\/how-to-use-box\/#create-a-free-account”,”itemListElement”:{“@type”:”HowToDirection”,”text”:”Click the blue \u201csign up\u201d button or use your Google account. If you don\u2019t use your Google account, fill in the information to get your account created.\n”},”image”:{“@type”:”ImageObject”,”inLanguage”:”en-US”,”url”:”https:\/\/www.cloudwards.net\/wp-content\/uploads\/2023\/06\/box-signup.png”}},{“@type”:”HowToStep”,”name”:”Add Your Information”,”position”:2,”url”:”https:\/\/www.cloudwards.net\/how-to-use-box\/#add-your-information”,”itemListElement”:{“@type”:”HowToDirection”,”text”:”If you don\u2019t use your Google account, fill in the information to get your account created. Once you verify your email address, you\u2019ll be able to access your new Box account.\n”},”image”:{“@type”:”ImageObject”,”inLanguage”:”en-US”,”url”:”https:\/\/www.cloudwards.net\/wp-content\/uploads\/2023\/06\/box-account-information.png”}}]}
2. How Do I Install Box on My Desktop?
The next thing you’ll want to do is download the Box Drive desktop app. It works with Mac and Windows and provides access to your files and folders, even those in the cloud. Here’s how.
- Open the App Tab
From the left sidebar on your account home screen, click on “apps.” Then, on the menu bar at the top, click “official Box.”

- Download Box Drive
Click on the “Box Drive” card and click “download.” After downloading, install Box Drive on your respective operating system, following the prompts.

- Log in to Your Account
Open the Box Drive app from your computer and enter your login information. After logging in, you’ll be able to access your synced files from the Box folder on your computer.

3. Installing Box on Mobile
Box has a mobile app for iOS and Android, giving you access to your account on the go.
- Open the App Store
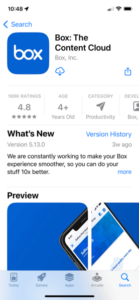
From your phone, open the Apple app store or Google Play store and search for “Box.”

- Download the Box Mobile App
Once you find the Box app (Box: The Content Cloud), install it on your mobile device.

- Log in to Your Account
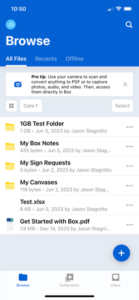
Open the app and enter your login credentials. You’ll then have access to your Box account and interface from your mobile device.

Using Box Apps
Every Box account includes several native apps, such as Box Notes, Box Sign and Box Canvas. The following step-by-step instructions will show how you can use these apps.
4. How to Use Box Notes
Box Notes is a web-based word processor that’s great for collaboration. Check out our Box Notes review to learn more.
- Open Box Notes
Click the “Notes” option, or the plus icon to the right of “Notes,” on the left sidebar. Clicking “Notes” will open a new window that shows any existing notes. Clicking the plus icon will create a new note in a separate window.

- Create a New Note
If you navigated to the Box Notes page, click the blue “new” button to create a new note.

- Open Existing Note
If you have existing notes, you’ll see them on the left side of the page. Click on an existing note to work on it.

- Delete Note
To delete a note, click on the note and then click on the three horizontal dots in the upper-right corner. Choose “delete this note” to delete.

5. How to Use Box Canvas
You can use Box Canvas for many things, as it is a digital whiteboard great for brainstorming or virtual creative collaboration.
- Open Box Canvas
From the left sidebar, click on “Canvas.” This will open the Canvas page.

- Create New Canvas
To create a new canvas, click on either the plus icon from the left sidebar or the page’s blue “new canvas” button.

- Open Existing Canvas
If you have existing canvas files, you will see them on the page. If you want to work on one, click on it.

- Delete Canvas
To delete a canvas, select the checkbox on a file and then click the trash icon. Confirm you want to delete by clicking “okay.”

6. How to Use Box Sign
Box Sign lets you send and receive digital signatures. You can also sign documents sent to you.
- Open Box Sign
From the left sidebar, click “Sign.”

- Create Signature Request
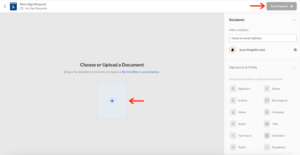
To request a signature, click the blue “request signature” button.

- Upload Document
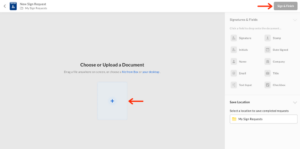
You can drag and drop a file or upload it from your computer. Options on the right side include adding email addresses or fields to the document. When ready, click the “send request” button.

- Sign a Document
If you need to sign a document, click the blue down arrow and choose “sign myself.” Follow step three and click the “sign and finish” button when ready.

File and Folder Management
Box gives you several ways to manage your files and folders, making it easy to keep your data organized and accessible.
7. Navigation With Box
These steps will show how to navigate around Box. Start with the left sidebar to navigate around your account.
8. Creating and Uploading
This section will show how to create or upload folders and files to Box.
- Create a Folder
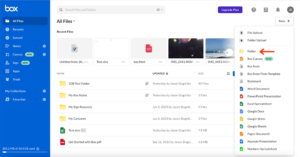
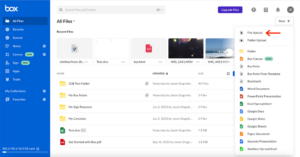
From your main account page, click the “new” button and choose the “folder” option. Give the new folder a name and invite collaborators via email, if desired. When ready, click the blue “create” button.

- Create a File
From your account page, click the “new” button and choose the type of file you want to create. Choices include Box apps, MS Office, Google or Apple documents. Give the new file a name. When ready, click the blue “create” button.

- Upload a Folder
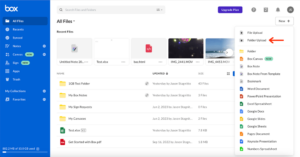
Uploading a folder works similar to creating one. Start by clicking the “new” button on your account page and choosing “folder upload.” From the window, select the folder you want and click “upload.” For a quicker process, drag and drop a folder from your computer into your account.

- Upload a File
Uploading a file works almost the same way. Click the “new” button on your account page and choose “file upload.” Find the file you want and click “upload.” Note that you can upload multiple files at one, including using the drag and drop feature.

9. Moving Folders and Files
You can move files and folders in Box as needed to keep things organized.
- Move a Folder
To move a folder, first click the checkbox that appears when you hover your cursor over a folder. Then, click the three dots menu and choose “move or copy.” From the window, choose the destination folder and click “move.” To forgo a few steps, you can drag and drop a folder into another folder.

- Move a File
The easiest way to move a file is to use the drag and drop feature to place the file where it’s needed. Alternatively, you can hover over the file you want to move and then click the checkbox. Then, from the three dots menu, choose “move or copy.” Lastly, choose the destination folder and click “move.”

10. Box File Sharing & Folder Sharing
Box gives you two main ways to share folders and files: using emails or creating links.
- Sharing a Folder
You can share a folder by hovering over it and clicking the share icon. Alternatively, you can check the checkbox and then click the blue “share” button in the top-right corner. Enter email addresses or create a shared link.

- Sharing a File
Sharing a file works the same way. Either hover over the file and click the share icon, or check the checkbox and then click the blue “share” button. Share to email addresses or create a shareable link.

- Secure Sharing
Free plans do not have the option to implement additional security measures. If you’re on a paid plan and want some extra security, click “link settings” and enter a password or set a link expiration date, if needed.

11. Adjusting Folder Settings
Every folder has settings letting you customize options like privacy, sharing and collaboration.
- Accessing Folder Settings
Accessing any folder settings starts by clicking the checkbox while hovering the cursor over the folder. From the three dots menu, choose “settings.”

- Choose Options
You’ll see several options, including collaboration options, privacy features and automation. Change the settings as needed.

- Save Changes
When ready, click the blue “save changes” button at the top of the page.

12. Box Account Settings
Each account has several settings, including those for security and the option to enable two-factor authentication.
- Make Changes
The first page shows you general options for your account. You can change the home page, the number of folders or files per page and the timezone or language. Setting up two-step verification is also an option. Other settings tabs include “sharing,” “security” and “profile.”

- Save Changes
When you are done making changes, click the blue “save changes” button at the top of the page.

Box Integrations & Add-ons
Box offers many third-party integrations and connections to popular apps like Slack, Zoom and Trello.
13. Using the Box App Store
To find an app, navigate to the Box app store.
- Open the App Store
From the left sidebar, click on the “apps” tab.

- Find an App
The main apps page shows you “featured” and “most popular” apps. You can click on the options along the top to narrow down your search, including “all,” “Box official” or “productivity,” to name a few. There’s also a search bar to find specific apps.

- Install or Connect to the App
Once you find an app to use, click on it, and then click on the “add” button. For most apps, you’ll need to grant Box permission to connect accounts and log in to the account you’re adding.

14. Connecting to MS Office
Box lets you connect to your MS Office account.
- Find the MS Office App
If you don’t see the “Box for Office for web” app on the Box app store landing page, click the “official Box” option at the top.

- Connect to MS Account
Click on the Box for Office web app and follow the prompts to log in to your MS Office account.

15. Connecting to Google Workspace
If you use Google Workspace, you can connect it to your Box account.
- Find the Google Workspace App
If you don’t see the Box for Google Workspace app on the Box app store landing page, click the “official Box” option at the top.

- Connect to Google Workspace
Click on the Box for Google Workspace app, click the blue “add” button and follow the prompts to log in to your Google account.

Using Box Business
It’s tough to do a how-to guide about Box and not mention its Box Business plans. Box Business takes everything from a Box account and adds analytical and team management features. Most of the features with Box Business are located in the admin console.
16. Access the Admin Console
Managing a Box Business account starts with accessing the admin console.
- Choose a Tab
On the left side, you’ll see a number of different admin sections. The landing page is your dashboard, which is a snapshot of your account information. Other options include “users and groups,” “reports” and “account and billing.”

17. Managing Users
Managing users is one of the critical aspects of a Box Business account.
- Add a User
From the admin console, open the “users and groups” tab. Then click on “add user.”

- Enter the User Information
On the form, enter the information for the user, including the name and email address. Click on “save” when done.

- Viewing Users
If you have users added already, you can view and make changes to the roles, groups and permissions.

Uninstalling Box App
If you decide that your time with Box is ending, it’s easy to delete your account permanently. From the account settings, scroll to the bottom of the page to find the “permanently delete account” link. Once you confirm this action, it’s final.

Removing the desktop or mobile app works like any other uninstall process. First, find the desktop app on your computer and follow the uninstall process, respective to the operating system. On Macs, this starts with Finder, and on Windows, through File Explorer.
For the mobile app, find it on your device and delete it as needed. On iOS, press and hold the Box app and then select “remove.” On Android, go to the Google Play store, go to manage apps, find Box and then tap “uninstall.”
Alternatives to Box
Box has plenty of competition in the cloud storage sector. Sync.com offers a more secure, private cloud storage experience, though with less functionality and fewer third-party connections. We cover this service more in our Sync.com review.
Dropbox is another competitor offering similar features and integrations. Check out our Dropbox review to learn more.
On the business side, Egnyte is a solid, although potentially expensive, alternative. Our Egnyte review has more details. Additionally, we compare the two services in our Egnyte vs Box article.
Another option is pCloud Business, which has an encrypted folder and team management features. We have the details in our pCloud Business review.
-
1
- :
- :
- :
- :
-
2
- :
- :
- :
- :
-
3
- :
- :
- :
- :
-
4
- :
- :
- :
- :
Final Thoughts: Using Box
Box doesn’t overcomplicate its service in many ways, and it should come easier the more time you spend with it. However, Box has many features, and initial impressions can seem overwhelming for those newer to cloud storage. This guide covered the basics to help you get started with Box and navigate the app.
Are you a Box user? Do you find Box easy to use? Is it easy to manage your Box data? Did we miss a feature that would be good for beginners? Let us know in the comments section below. Thanks for reading our article.
FAQ: How to Use Box
-
Box works like most other cloud storage services. You can store folders and files in your account and share them with others using email or through a created a link. Box also has popular third-party connections to services like Google Workspace and MS Office.
-
From your account page, you’ll see a “new” button. Click it to create a new file or folder. If you’ve connected your account to Google, MS Office or Apple, you’ll see options to create documents from those services as well.
-
The “all files” tab shows everything you’ve created or uploaded to your account. A search bar at the top of the page lets you search for files in your account.
-
If you store synced files locally in the app, Box lets you share folders or files using either an email address (if sharing with another Box user) or by creating a link to share manually.
{“@context”:”https:\/\/schema.org”,”@type”:”FAQPage”,”mainEntity”:[{“@type”:”Question”,”name”:”How Does Box Work?”,”acceptedAnswer”:{“@type”:”Answer”,”text”:”
Box works like most other cloud storage services. You can store folders and files in your account and share them with others using email or through a created a link. Box also has popular third-party connections to services like Google Workspace and MS Office.\n”}},{“@type”:”Question”,”name”:”How Do You Create a File in Box?”,”acceptedAnswer”:{“@type”:”Answer”,”text”:”
From your account page, you\u2019ll see a \u201cnew\u201d button. Click it to create a new file or folder. If you\u2019ve connected your account to Google, MS Office or Apple, you\u2019ll see options to create documents from those services as well.\n”}},{“@type”:”Question”,”name”:”How Do I Find Files in Box?”,”acceptedAnswer”:{“@type”:”Answer”,”text”:”
The \u201call files\u201d tab shows everything you\u2019ve created or uploaded to your account. A search bar at the top of the page lets you search for files in your account.\n”}},{“@type”:”Question”,”name”:”How Do I Send Files Through Box?”,”acceptedAnswer”:{“@type”:”Answer”,”text”:”
If you store synced files locally in the app, Box lets you share folders or files using either an email address (if sharing with another Box user) or by creating a link to share manually.\n”}}]}
The post How to Use Box in 2023: Beginner’s Guide appeared first on Cloudwards.

