We’ve raved about Trello numerous times. In fact, Trello sits proudly in our roundups of the best project management software and the best free project management software. While Kanban methodology and Trello itself are fairly straightforward, we have decided to put together this Trello tutorial to help those new to the platform navigate some quirks and hit the ground running.
Key Takeaways: Trello Tutorial
- Trello makes planning, organizing and tracking tasks easy with large boards that are easy to use.
- Trello can integrate with many third-party applications, which helps make the platform incredibly powerful.
- Automations are easy to set up and can help save you a lot of time.
- You can sign up for a 14-day trial of Trello Premium, which we recommend so that you can see some of the platform’s more advanced features. You can also use the free plan.
In this guide, we’ll show the project management basics, including how to create a Trello account, customize boards and Trello cards, use power-ups and automations, and cover many advanced features. Also, be sure to read our full Trello review to see if it’s right for you. If it is, and you’re ready to manage projects and become a Trello task management ninja, read on.
-
05/25/2023 Facts checked
Our Trello tutorial has been rewritten with new information and now uses an easy-to-read format.
-
Fortunately, Trello is incredibly easy to learn. Trello’s user interface is very intuitive and has easy-to-navigate menus. Trello offers comprehensive learning materials as well.
-
Trello is perfect for teams that need basic project management tools. If you need a tool that will help you visualize where in the pipeline your project tasks are, and that can keep your teams on track, Trello is for you. However, for complex projects, look at monday.com (here’s our monday.com review) or ClickUp (Here’s our ClickUp review).
-
The best way to organize your projects is by creating lists representing various workflow stages. Ideally, you’ll want a to-do list, an “in-progress list” and “a done” list. You can add whatever other steps you need in list form as well. For example, if you have a publication and need a review or editing process, create lists for them.
-
Keep your boards relatively simple, so tasks can flow between lists effortlessly. Also, don’t be afraid to integrate Trello with other platforms and use as many power-ups and automations as possible. You’ll find that Trello can do a lot of the heavy lifting for you.
-
Trello is ideal for managing multiple projects and many team members. As long as your projects are not too complex, you’ll find Trello to be a valuable piece of software.
{“@context”:”https:\/\/schema.org”,”@type”:”FAQPage”,”mainEntity”:[{“@type”:”Question”,”name”:”Is Trello Easy to Learn?”,”acceptedAnswer”:{“@type”:”Answer”,”text”:”
Fortunately, Trello is incredibly easy to learn. Trello’s user interface is very intuitive and has easy-to-navigate menus. Trello offers comprehensive learning materials as well.\n”}},{“@type”:”Question”,”name”:”What Is Trello Best Used For?”,”acceptedAnswer”:{“@type”:”Answer”,”text”:”
Trello is perfect for teams that need basic project management tools. If you need a tool that will help you visualize where in the pipeline your project tasks are, and that can keep your teams on track, Trello is for you. However, for complex projects, look at monday.com (here’s our monday.com review) or ClickUp (Here’s our ClickUp review).\n”}},{“@type”:”Question”,”name”:”How Do I Organize My Projects in Trello?”,”acceptedAnswer”:{“@type”:”Answer”,”text”:”
The best way to organize your projects is by creating lists representing various workflow stages. Ideally, you’ll want a to-do list, an “in-progress list” and “a done” list. You can add whatever other steps you need in list form as well. For example, if you have a publication and need a review or editing process, create lists for them.\n”}},{“@type”:”Question”,”name”:”How Do I Use Trello Most Efficiently?”,”acceptedAnswer”:{“@type”:”Answer”,”text”:”
Keep your boards relatively simple, so tasks can flow between lists effortlessly. Also, don’t be afraid to integrate Trello with other platforms and use as many power-ups and automations as possible. You’ll find that Trello can do a lot of the heavy lifting for you.\n”}},{“@type”:”Question”,”name”:”Is Trello Good for Managing Multiple Projects?”,”acceptedAnswer”:{“@type”:”Answer”,”text”:”
Trello is ideal for managing multiple projects and many team members. As long as your projects are not too complex, you’ll find Trello to be a valuable piece of software.\n”}}]}
Trello Tutorial: Setup & Basics
Before seeing what Trello offers, you need to sign up for an account. In this guide, we’ll be showing you how to sign up for a free account. There are paid plans too, with slightly more advanced features, which you can learn about in our Trello pricing guide. Let’s get you signed up for a free Trello account.
How to Set Up a Trello Board & Invite Team Members
Before you can start playing with all of the wonderful tools that Trello has to offer, you need to create an account. Fortunately, as you’ll see below, the process is easy.
- Go to Trello’s Website
Getting started with Trello is simple. Head to Trello’s website, and click the “get Trello for free” button in the top-right corner. From here, you’ll be asked to enter your email address.

- Enter Your Information
Next, name your workspace and add your teammates to the board. The wonderful thing about Trello’s free account is that there are no limits on the number of team members. Next, click the “create your workspace” button. When you click the button, you’ll be asked if you want a trial of Trello’s Premium plan. For this guide, we will accept the trial.

- Create Your Board
Trello boards are where you’ll get your work done. Click the “create your first board” button, enter a board title and choose between a private board (which could be for a personal to-do list), a public board (which everyone can see) or a workspace for your team. Next, choose a background. Lastly, we will click the “create” button and will skip the Trello templates.

{“@context”:”https:\/\/schema.org”,”@type”:”HowTo”,”name”:”How to Set Up a Trello Board & Invite Team Members”,”description”:”These step-by-step instructions show how to sign up for a Trello account.”,”totalTime”:”P00D01M00S”,”supply”:0,”tool”:0,”url”:”https:\/\/www.cloudwards.net\/trello-beginners-guide\/#how-to-set-up-a-trello-board-invite-team-members”,”image”:{“@type”:”ImageObject”,”inLanguage”:”en-US”,”url”:”https:\/\/www.cloudwards.net\/wp-content\/uploads\/2023\/05\/Trello-Tutorial1.png”},”step”:[{“@type”:”HowToStep”,”name”:”Go to Trello\u2019s Website”,”position”:1,”url”:”https:\/\/www.cloudwards.net\/trello-beginners-guide\/#go-to-trellos-website”,”itemListElement”:{“@type”:”HowToDirection”,”text”:”Getting started with Trello is simple. Head to Trello’s website, and click the \u201cget Trello for free\u201d button in the top-right corner. From here, you’ll be asked to enter your email address.\n”},”image”:{“@type”:”ImageObject”,”inLanguage”:”en-US”,”url”:”https:\/\/www.cloudwards.net\/wp-content\/uploads\/2023\/05\/trello-signup.png”}},{“@type”:”HowToStep”,”name”:”Enter Your Information”,”position”:2,”url”:”https:\/\/www.cloudwards.net\/trello-beginners-guide\/#enter-your-information”,”itemListElement”:{“@type”:”HowToDirection”,”text”:”Next, name your workspace and add your teammates to the board. The wonderful thing about Trello’s free account is that there are no limits on the number of team members. Next, click the \u201ccreate your workspace\u201d button. When you click the button, you’ll be asked if you want a trial of Trello’s Premium plan. For this guide, we will accept the trial.\n”},”image”:{“@type”:”ImageObject”,”inLanguage”:”en-US”,”url”:”https:\/\/www.cloudwards.net\/wp-content\/uploads\/2023\/05\/trello-workspace.png”}},{“@type”:”HowToStep”,”name”:”Create Your Board”,”position”:3,”url”:”https:\/\/www.cloudwards.net\/trello-beginners-guide\/#create-your-board”,”itemListElement”:{“@type”:”HowToDirection”,”text”:”Trello boards are where you’ll get your work done. Click the \u201ccreate your first board\u201d button, enter a board title and choose between a private board (which could be for a personal to-do list), a public board (which everyone can see) or a workspace for your team. Next, choose a background. Lastly, we will click the \u201ccreate\u201d button and will skip the Trello templates.\n”},”image”:{“@type”:”ImageObject”,”inLanguage”:”en-US”,”url”:”https:\/\/www.cloudwards.net\/wp-content\/uploads\/2023\/05\/trello-board-creation.png”}}]}
How to Customize Your Board’s Look
If you’re not a fan of the iconic blue background that Trello uses, Trello will let you customize your board. In the next few steps, we will show you how to make your board reflect your personal style a little more.
- Choose Your Favorite Image
Once in the overflow menu, you can choose from a diverse range of photographs, solid colors and gradients, or you can upload an image to use as a background. Choose your preferred background, close the menu, and you’re all set.

How to Create Lists & Cards
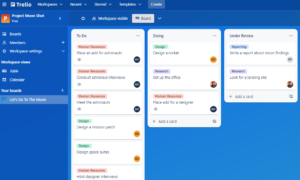
Lists and cards are what will make your kanban board come alive. Your lists will represent projects or project stages, while kanban cards represent individual tasks. The best part is that Trello makes it incredibly easy to get your board set up. Follow the steps below to create your first lists and cards.
- Create Your First List
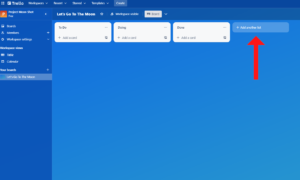
Now you can start creating your lists and cards. Kanban lists generally have titles like “to do,” “doing,” “under review” and “done.” The lists then contain cards that represent tasks in your project. The Trello workflow is simple. You move the cards from left to right through each list until the task is complete. To create a list, click the “add another list” button.

- Name and Position Your List
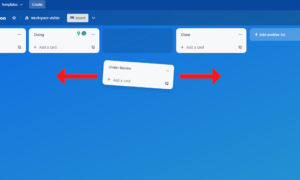
Next, you’ll be asked to give the list a title. Once you have named your list, click “add list” to add it to the board. Once done, click and hold on the card and then drag and drop the list into the correct place on your board.

- Create a Kanban Card
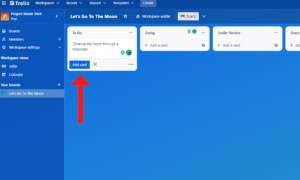
Next are the kanban cards. You can see that each list has a “add a card” button. Click on the “add a card” button in the list where you want the card to go. You’ll be asked to give the card a title when you do this. Enter your title and then press “add card.” You simply repeat these steps until every task for your project is represented on the board.

- Explore Your Card
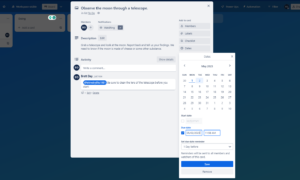
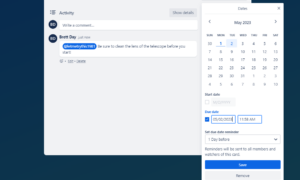
Once a card has been created, click on it to enter the card. From here, you’ll see options on the right of the card like members, dates, labels, checklists and more. You click on these options to assign tasks, due dates, labels (that will help you filter your cards) and other pertinent information. You can even attach files and images that support the task.

- Creating Comments
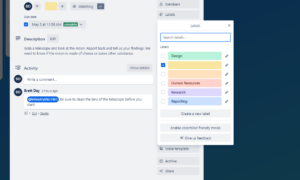
In the middle of the card, you can leave a task description and communicate with the assignee with @mentions. To mention a team member, insert an “@” symbol and either type the member’s name or click on their name from the list that appears. The commenting and attachment systems turn Trello into a decent team collaboration tool.

How to Create & Use Custom Fields
At the start of this beginner’s guide, we used the 14-day trial of the Premium plan. We did this to show you how to use custom fields. Custom fields aren’t available in Trello’s free version, but are an important feature in the Standard plan and up. Custom fields allow you to add data to your cards, which can enhance your workflow. Next, we’ll show you how to use them.
- Create a Custom Field
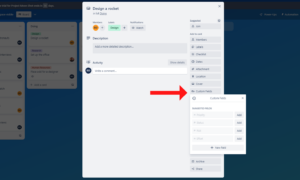
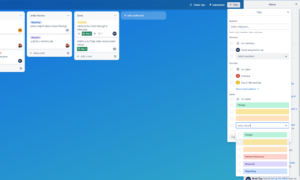
To create custom fields, click on a card and then click the “custom fields” button — a pop-out menu with suggested custom fields appears. You can use these fields or create your own by clicking the “new field” button.

- Choose a Custom Field Type
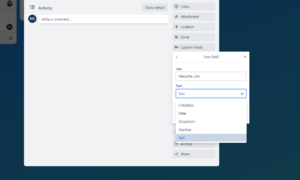
Next, click the “add new field” button, give the custom field a title and choose if you want it to be a dropdown box, a checkbox, a date field, a number box or a text field.

- Customize the Fields
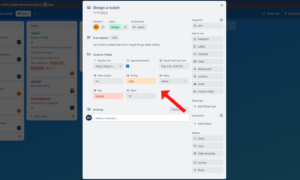
The next step is to add as many custom fields as needed to make the card fit your project and workflow. You will need to enter any required information into the fields, such as links, or options for a dropdown menu. As a bonus, custom fields are visible on the card from the kanban board view. Custom fields make Trello versatile and should be considered when setting up your account.

How to Search & Filter Cards
Now that you know how to set up lists and create cards in Trello effectively, you can learn how to find cards or tasks on a populated kanban board. From experience, we tell you that keeping track of cards on a heavily populated kanban board can be tricky, so it’s worth learning how to filter and search.
- Label Your Cards
Cards in Trello are filtered by assignee, keywords, due dates and more. However, one of the best ways to filter your cards is via labels that can help categorize your tasks. For example, on our board, we have made red represent human resources and purple represents design tasks. To add labels to a card, click on a card, then select labels from the right menu.

- Edit Your Labels
In the pop-out menu, you can select a color for a card by clicking the box to the left, and you can give a color a title by clicking the pen to the right. Next, go through your board and categorize your cards. You can use multiple labels for a single card if needed. When you’re finished, click out of the card to view your kanban board.

- Filter by Label
Of course, you can also filter your searches by choosing one of the labels you created. When you click next to a label, only the cards with that label will be shown on your board. You can also use the search bar at the top of the screen to search for a card. Trello’s search and filter system is powerful and, when used correctly, can save you lots of time.

Trello Advanced Features: Power-Ups & Automations
We’ve covered a few Trello project management basics, and you should now have a simple yet effective board with cards that can hold plenty of Trello data. Still, there’s so much more to Trello. In this section, we’ll touch on a few advanced features that every project manager should know about.
1. How to Add & Use Trello Power-Ups
Believe us when we say you can make Trello powerful with Trello’s power-ups. Without much fuss, you can make Trello play nice with many other project management tools (read our best cloud storage services roundup for ideas), such as Asana (here’s our Asana review). In addition, tools like Slack and Microsoft Teams, as well as time-tracking apps and more, can join forces with Trello.
- Click the Power-Up Button
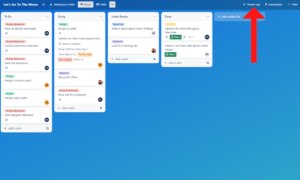
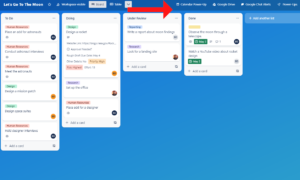
To start adding unlimited integrations, click on the “power-up” button that’s located in the top menu bar. You’ll be whisked away to a power-up store that houses native Trello power-ups and third-party integrations. Be sure to check because some of the third-party options require a fee.

- Search for Power-Ups
Once in the power-up menu, you can quickly search for power-ups by using the search bar on the left, or you can click through the categories. You can also click on each power-up card for more detailed information. When you find a power-up you want to use, click the “add” button on the power-up card.

- Configure the Power-Up
Some power-ups will start working immediately, while others may need to be configured. The power-ups that generally need attention are services such as Google Drive that need to be connected to your account. When inside a power-up card, click on the card’s “settings” button to configure the service. When done, head back to your kanban board.

- Manage Your Power-Ups
When a power-up is activated and configured, it’s ready to use. You can find and manage your power-ups in the menu bar above your workspace. To disable or reconfigure power-ups, click on the power-up icon. Now you can change the settings or disable any of your power-ups. Trello has made it easy to use integrations, which is a win.

Trello Butler Automations: How to Set Up Automation Rules
Are you tired of manually sending status updates via Slack? Are you sick and tired of assigning tasks? Ugh! Who has time for that? Well, Trello can handle all of these things for you via butler automations. Below, we’ll take a quick look at how to set up automations in Trello so that you can relax a little.
- Locate the Automation Button
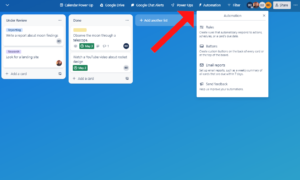
First, locate the “automation” button on the top menu (it’s next to the power-ups button). Click the “automation” button to enter the automation home screen.

- Choose Your Automation Type
Decide which type of automation you’d like to use and click on the option. Then, click the “create” button in the top-right corner.

- Select Your Trigger
The next step is to and then click the “add trigger” button. Now, you need to tell Trello what action will trigger the automation (for example, a card moving to a new list, a change in status, or whether a checklist has been completed). Next, define the “if this happens, that happens” rules. Read the options and then click the plus sign next to the trigger that will be a part of your rule.

- Choose Your Action
Next, you need to choose the outcomes for your chosen trigger. Take your time and read each option and choose which one works for you. Once you have made your choice, click the “save” button.

Building automations is as simple as that. If you’re still confused, don’t worry; we’ll walk through some automation examples next.
Trello Butler Automation Example: Automate Due-Date Notifications
We want to create a rule that says when a due date is added to a card, every member of that card will receive an email notification.
- Choose Your Trigger
From the create a rule screen, click the “date” button. The top option has a few dropdown menus with changeable parameters. We have ours set to “when a due date is set on a card by me.” The bold text here shows what options in the rule can be changed. Change the options as needed to create the first part of your rule, and then press the plus sign.

- Choose an Action and Configure It
Now you need to set the action. For this example, we’ll click the “content” button. A menu is populated with actions. Scroll down to the email section. There are two options here: message everyone on the card, or message the board. We want to notify those on the card, so choose the “to every member on the card” option. Next, add a subject for the email and a description. Next, click the plus button.

- Save Your Rule
Now you can see your fully built rule at the top of the screen. Check all the information; if all is well, click the “save” button. Your rule is now set. From now on, every time you add a due date to any card, the members of that card will be notified automatically.

Trello Butler Automation Example: Automatically Archive Completed Cards
For the next automation example, we will create a simple rule that will archive all of the task cards in the done list on the first Monday of every month.
- Add an Action
First, click “add trigger” to display the list of actions. Click the “move cards” button and look at the fifth option about archiving cards. You can choose to archive cards from a specific list (we chose the “done” list), and you can tell Trello to only archive cards that are a certain number of days old (we chose 30 days). Next, click the plus sign and then the “save” button. Voila! Your scheduled automation is complete.

3. Managing Trello Butler Automations
Managing your automations is just as easy as creating them. Trello designed an easy-to-use system that allows you to see and manage the automations you have created. Next, we will show you how to manage your rules.
- Edit or Delete Your Rules
Click on the “automations” button from the main board screen. If you have set up any automations, they’ll be displayed for you. You can quickly edit your automations by clicking the pen icon and delete them by clicking on the trash can icon. Play around with rules and automations. You’ll soon find that they can save you so much time.

Final Thoughts: Using Trello
Of all the software that uses kanban boards, Trello is easily one of the best kanban apps and is far easier to use than software that relies on Gantt charts. Thanks to its ease of use, Trello is ideal for teams just starting to use software to help them plan, organize and track tasks. We hope this Trello guide helps you and your team hit the ground running.
Now that you have read our beginners guide to Trello, will you be signing up for a free account? If so, what about Trello are you looking forward to most? Let us know in the comment section, and as always, thanks for reading.
The post Trello Tutorial for 2023: Make the Most of Your Kanban Boards appeared first on Cloudwards.

