Many people have a cool product they want to sell over the internet, but just don’t know how to do it. That’s why we decided to write this beginner’s guide to Shopify, in which we’re going to explain how to use this great ecommerce tool to build your own retail store online.
Shopify is one of the biggest online retail platforms worldwide. It’s cloud-based software that allows you to create an online store with a few clicks. It covers the most important features of an online store, such as payments, inventory, product management, shop design, legal and many more. It’s not for nothing that is used by over 600,000 companies around the world.
Shopify was founded in 2004 as a retail store of itself. Back then, Tobias Lutke, Daniel Weinand and Scott Lake wanted to sell snowboards online, but were unhappy with the existing online shop solutions and decided to develop their own software. In 2006, they made it available to the world as an open source program.
At the time, there were few decent ecommerce solutions available. Wix was released in 2006 (read our Wix review), Magento in 2008 and WooCommerce in 2011. Even though Squarespace (read our Squarespace review) was up and running in 2003, it didn’t come with a shop builder and was focused on hosting services.
In this guide, you’re going to learn how to create a simple web shop, by adding products and customizing its look. Then, we’ll give you a short introduction to the domain management in Shopify and how to publish your store, so let’s get started. Once you’ve mastered the material here, you may also want to create a landing page for your store; we recommend you check out our Instapage guide for that.
Pros and Cons of Shopify

Like any other application, Shopify has its pros and cons. Its greatest advantage is that the installation and configuration are simple, which makes it easy to start your online business. You don’t need developers to set up your online store, so you can focus on what you know best, and that’s doing business.
Shopify specializes in providing online shops in many ways, so you practically buy expert knowledge as part of the service. That is useful for security, data protection and payment processing. Shopify is secure, as well, meaning sensitive data, such as customer information, shipping addresses and payment information, will be kept safe.
Another interesting point is that customers are more willing to buy products from you if your website makes a secure and consistent impression. If the browser tab freezes or crashes while they’re placing an order, your customers will hesitate to enter their credit card information.
You won’t have to worry about that, though. Shopify was stable during our testing and, if something happens, you can access support around the clock or look at the high-quality University Guides at Shopify’s help center.
The service supports many payment options, allowing you to design your retail store more internationally. You can use Shopify’s payment gateway, PayPal, Stripe, Amazon Pay, Apple Pay or even cryptocurrencies such as bitcoin.
There are also country-specific payment providers, which may be unknown internationally, but are market leaders in the country where you want to sell, so there is a solution for everyone.
Because it’s an all-in-one shop solution, the Shopify App Store has many features you can integrate into your store easily. On top of that, you can choose from dozens of themes, created by experts, that will make your online business look great and more professional.
You can also integrate accounting. QuickBooks Online (read our QuickBooks Online review) and Xero (read our Xero review) play nice with Shopify, which we think makes a lot of sense. Rather than making you manually enter 200 sales every day, those programs will import them automatically.
Liquid for Fluid Business

If you want to change your theme profoundly, though, simple CSS and HTML are not enough. You need to know Liquid, the Shopify programming language. Even if you want to hire a freelancer, you may encounter problems, since it is not a widely used language. This allows developers to charge you ridiculous prices.
Shopify also comes with numerous integrated marketing — email marketing, product reviews and social media integrations — and search engine optimization features.
For you and your online store to be found on Google, you will need to follow certain SEO criteria, which are set by Google. Shopify takes on some of that work for you. It also has a powerful analysis and dashboard feature that allows you to monitor your different marketing channels better.
Shopify offers a blog feature, too, so you can easily set up your blog about your product and market. That said, Shopify is in many ways beat by WordPress (read our beginner’s guide to WordPress). If your online business is heavily reliant on content marketing, you might want to use a WordPress blog with a WooCommerce plugin.
Shopify and Dropshipping

Shopify is often used for the so-called drop-shipping business model, which means running an online store without any inventory or stock-keeping. The products you offer in your shop are not delivered to the customer by you, but by a manufacturer or supplier.
As a drop-shipper, all you have to do is to make sure that your shop is running smoothly and the sales come in. The trade-off is you lose control over customer satisfaction because you cannot directly influence or control the supplier.
Part of making sure your online store runs smoothly involves presenting professional, eye-catching product images. It might seem trivial, but small details like blurring the background of a picture to give more prominence to the product can make a big difference. There are easy guides out there on how to achieve this. It’s something to consider when collecting and presenting your product images.
Shopify is one of the easiest ways to start a drop-shipping business. Integration partners such as Oberlo have automated interfaces through which your online shop orders directly from your supplier. The hassle-free method outclasses its rivals because you have to pay little to no fees to your drop-shipper, while Amazon or eBay charge you.
While we’re talking fees, Shopify’s pricing should be treated with caution. In addition to the basic fees ($29, $79 or $299 per month), it charges for every transaction that goes through your online store. Initially, the fee is 2 percent, but it falls to 1 percent as the transaction volume increases.
That’s an increasing cost you should consider. As your sales increase, so will the amount you have to pay to Shopify.
How to Use Shopify
In this section, we’ll show you some of Shopify’s features and best practices for using it, so you can start a solid online business today.
First Steps with Shopify
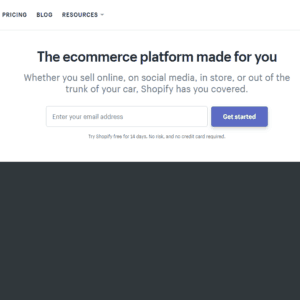
First, you need to create a Shopify account. You can start with a free 14-day trial. Go to Shopify.com and fill in your email address in the box in the middle, then click on “get started.”
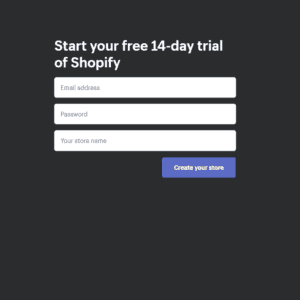
Enter your password and the shop name before you hit “create your store.”
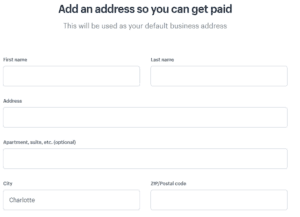
Once you’re done, wait until Shopify sets up your shop. For the next step, you have to punch in some personal information to proceed.
When you are finished, click on “enter my store.” The next thing you see is the control panel for your online business. On the left side, you can find the navigation bar which allows you to jump between different functions.
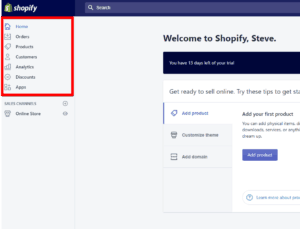
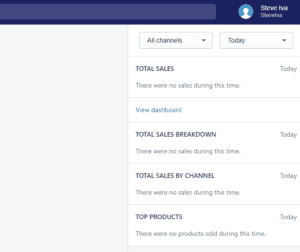
On the right, you will see a small dashboard that shows the key figures for your shop: “total sales,” “total sales by channel” and “top products.”
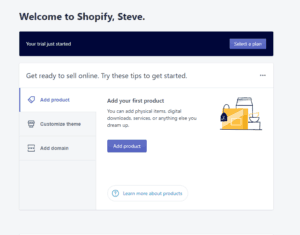
In the middle of the screen, you should see the three most important steps for launching your online store: “add product,” “customize theme” and “add domain.”
How to Add a Product
In Shopify, there are two ways to create a product. Click on “add product” in the middle of the welcome page or, if you have already closed that window by mistake, hit “products” in the navigation bar on the left side. Then, you should see the following screen.
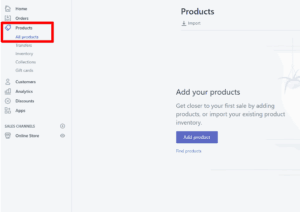
Click on “add product.” If you don’t want to add each product by hand, you can upload your product catalog as a .csv file. To avoid system errors, empty fields or other problems, Shopify specifies a structure for the import file.
After you click on “import,” the following pop-up appears.
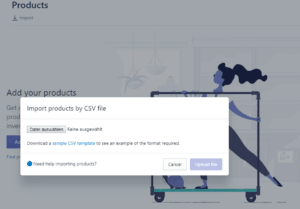
There, you can download a sample .csv file by clicking the blue “sample CSV template” text, which has the structure Shopify wants. In this tutorial, we will create the products manually, though. Simply click on “add product,” and you’re ready to go.
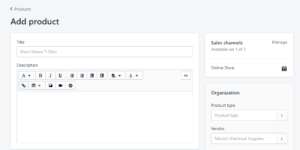
Enter the product name in the “title” field and the product description in the “description” field.
The product image, name and description are the decisive information for your page visitor to click on your product and ultimately buy it. They are critical drivers of your conversion rate, so your business success rises or falls with them.
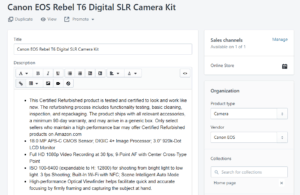
Then, choose the sales channels you want to use to offer your product on the right side. Fill in the product type, the vendor and the collection the product belongs to.
While we’re at it, always categorize your products into collections. It will make it easier for your customers to find the product they’re looking for. Shopify distinguishes between automated and manual collections. In this tutorial, we will work with the pre-generated “home page” collection.
Your product should now look like this.
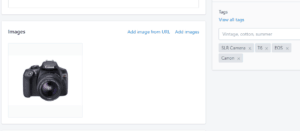
Next, we need to add a good product image and meaningful tags. Shopify has an automatic zoom function on every product image you upload. Each image will be displayed in normal size, but when you hover over it, the place your mouse is at will be highlighted. Amazon does much the same thing. That means adding high-resolution pictures is key.
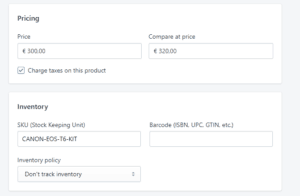
Now, let’s talk about pricing options. In the “pricing” section, you’ll see three important fields: “price,” “compare at price” and “charge taxes on this product.”
“Compare at price” is crucial if you want to show your customers that the product is on sale. The price displayed here is the original before discount and the price people can buy it for is in the “price” field. If you don’t want to make a special offer on the item, leave the “compare at price” field empty.
The most important aspects for selling online are inventory and warehousing. In this context, we’re going to talk about SKU or the stock keeping unit.
The SKU is an internal identifier that you should set for each product and each variation of it. You can quickly reach 200 product types, which makes it difficult to keep track without a proper way to identify them. The result is absolute chaos for you and the customer.
The SKU has nothing to do with barcodes. It’s just to help you find products faster and keep track of your product portfolio. We recommend you add a standardized SKU to every product right from the start.
A possible standard could be: five letters of the manufacturer’s name, three letters of the product series, two letters for the product model and three letters for the product name. For our camera example, we would go with something like CANON-EOS-T6-KIT.
When customers buy products from your online store, they still have to get it delivered to their homes.
If you sell internationally, you have to deal with international customs. Each product must have an International Customs Code to determine the import/export costs in advance.
As a retailer, you should know how many customs fees are added to each of your products, so your customers don’t get a nasty surprise at the checkout. Shopify helps you with a link to the HS-Custom Finder tool, where you will find the corresponding code.
Since product weight is also a factor for shipping fees added during the checkout process, it is best to get it from the manufacturer.
If you sell digital products, such as ebooks, audiobooks or music, none of that is necessary. Just uncheck the “this is a physical product” checkbox. Since our Canon camera is not a digital product, though, we have to indicate the weight and the International Customs Code. In our case, it looks like this.
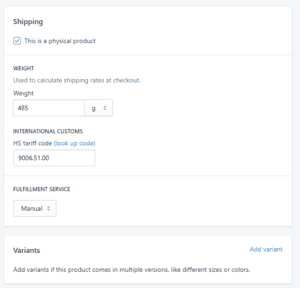
Let’s leave variants open for now.
Finally, we’re going to show you how to adjust the product SEO, which is important if you’d like to sell the product. In order to change it, click on the “edit website SEO” link and fill in the title and meta description. You can also customize the URL.
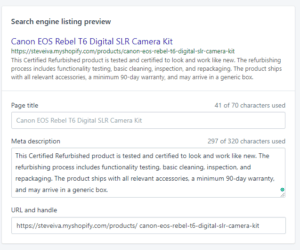
Now click on “save” and wait until Shopify creates your product. It should then appear in your product overview.
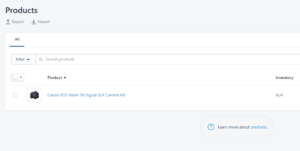
Congratulations, you just added your first product to your online store.
Customize Your Theme
Now that you know how to add products to your online shop, let’s see what your shop actually looks like. Go to the “sales channel” section in the navigation bar on the left side and click on the eye icon next to “online store.”
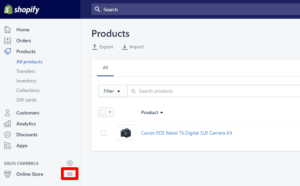
You should see the following page.
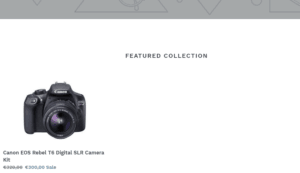
As you can see, the product we created appears in the preview, but, if you scroll up and down you will notice that the design of the shop is boring and unattractive.
We’re going to show you how you can change that. First, navigate back to the homepage by clicking on “home” or the Shopify logo at the top of the navigation bar, then click on “customize theme.”
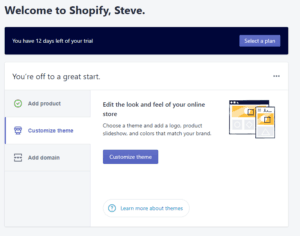
Like any other Shopify store, your shop was created with the “debut” theme. Now you have two choices: click on “customize” and change the existing “debut” theme or upload a new design that overwrites the existing one.
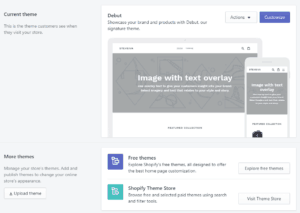
Customizing themes usually comes after the layout selection. It is the refinement of existing layouts and should not be used for major style adjustments. If you don’t like the look of a theme, choose a different one before trying to customize it.
In this beginner tutorial, we’re going to replace a theme. You can choose between free and paid templates, but, for now, we’ll settle for a free one. Click on “explore free themes” to get an overview of free Shopify themes.
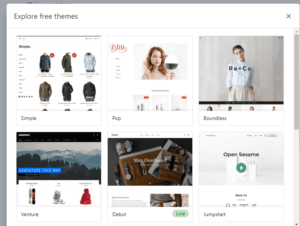
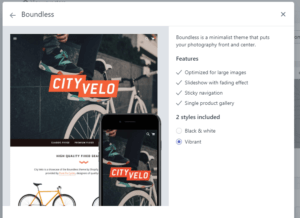
Look through the themes and click on the one you like best. Each theme has several layouts to choose from, as well. We chose the “boundless” theme, with “vibrant” layout settings.
After adding the new theme, it should appear in the theme overview, right under the “debut” theme.
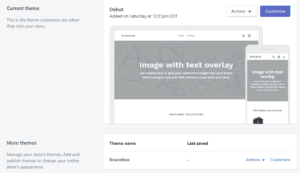
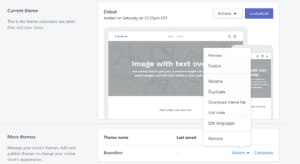
It is added to your shop, but not activated yet. Click on “actions” below the new layout and then hit “publish.”
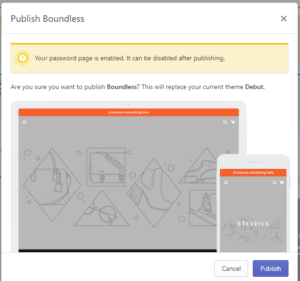
You should see the following pop-up. Click “publish” again to confirm.
Go back to the preview function and look at the new design of your shop.
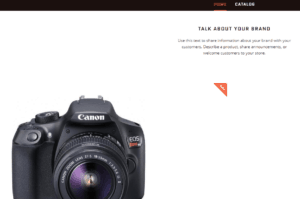
Even though there are still many gray placeholders — wildcards you have to replace through customization — the layout looks much better.
How to Add a Domain to Your Online Store
Let’s move on to the last part of our guide, the publication and domain management of your online shop. After fixing the look of your shop and adding products, it’s time to make your store available to the world.
To finish, go back to the home screen by clicking on “home.”
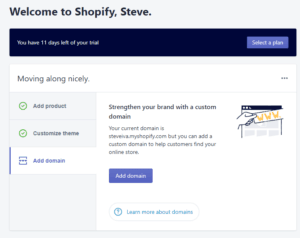
Then, click on “add domain” to open the domain administration.
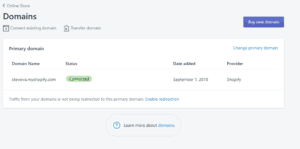
There are three ways to change your shop’s domain: “connect existing domain,” “transfer domain” and “buy new domain.” In the interest of consistent branding, the domain should be descriptive. By default, Shopify domains end with “.myshopify.com.” You can purchase your personal domain through Shopify by hitting “buy new domain.”
If you have already have a domain, which would be great, you can go to “connect existing domain” and enter the corresponding domain in the displayed field.
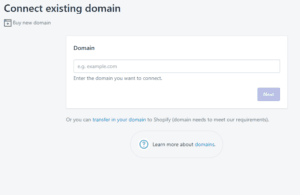
You probably know the difference between connecting and transferring a domain because you have bought them in the past. If you don’t, check out our article on how to register a domain name.
Which solution is better depends on you. We tend to leave the domains with the provider so we don’t lose track of them. If you have a domain at Shopify, then maybe another one at Siteground or Bluehost or any of our best web hosting providers, you can quickly lose track.
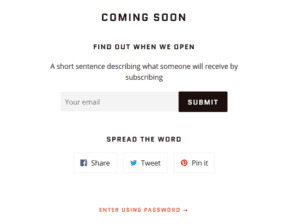
Adding a domain is optional with Shopify. You can also publish your shop with the default domain (.myshopify.com), which we will do in this tutorial. If you log out of Shopify now and enter your URL in your browser, you should see the following.
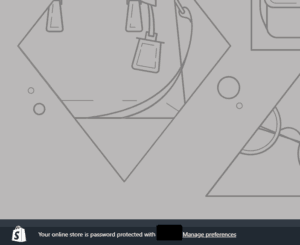
Each time you enter the preview mode, you will see a bar at the bottom left of your screen that displays the online password for your store.
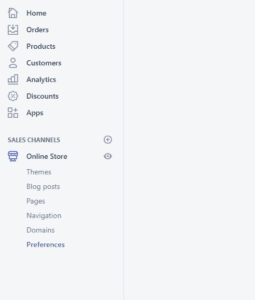
Alternatively, you can find the password under “sales channels” > “online store” > “preferences.”
You can deactivate the password or assign a new one under “password protection.”
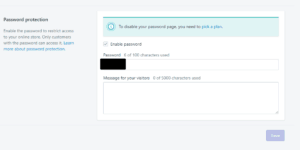
However, you will notice that you can only deactivate the password after you have purchased a paid plan, though.
Final Thoughts
Shopify is a diverse tool with enough functions to meet everyone’s needs. We don’t recommend it as a silver bullet for every business, though. In fact, its value depends on the company size, your business strategy and many other factors.
If your online business relies on content marketing, Shopify isn’t the best decision for you. Plus, costs are a big issue, especially with larger sales figures. You should consider that Shopify pays for itself less and less, the bigger your sales are.
If you have basic requirements and want to start your online store quickly, though, you should use . For anything more complex, you might have to hire a Shopify developer. For example, if you are a stable company with an established brand, you may have to heavily modify your shop, which can be expensive. Another deal breaker is Liquid and the related costs.
That said, it’s a great opportunity for small businesses because you can run your online shop for just $30 a month plus charges. Whether you want to sell shoes, snowboards or lederhosen, Shopify will work for you. If you’re still not convinced, try the 14-day trial. You won’t need to provide credit card information to do so.
Have you tried Shopify? Tell us in the comments below what you used it for and which feature you liked best. Thanks for reading.
The post Beginner’s Guide to Shopify: Ecommerce the Easy Way in 2023 appeared first on Cloudwards.

