In November 2018, Microsoft released Dataflows in public preview. Later on, in April 2019, Dataflows became generally available. Dataflows used to be available in Premium licenses only, but it is now available in Power BI Pro with some limitations. The purpose of Dataflows is to support collaborative self-service data preparation and Extract, Transform, and Load (ETL) processes in an organization by leveraging the power of Power Query in the cloud.
This article is an excerpt from the book Expert Data Modeling with Power BI, Second Edition written by Soheil Bakhshi.
In the following article, we will learn how to create a Dataflow within the Power BI Service, before looking into how to create a new entity, a table within the Dateflow.
Create Dataflows
To create a Dataflow, we must log into our Power BI Service in a web browser. The following steps show how to start creating new Dataflow:
- Select a desired Workspace.
- Click the New button.
- Click Dataflow.
The preceding steps are highlighted in the following image:
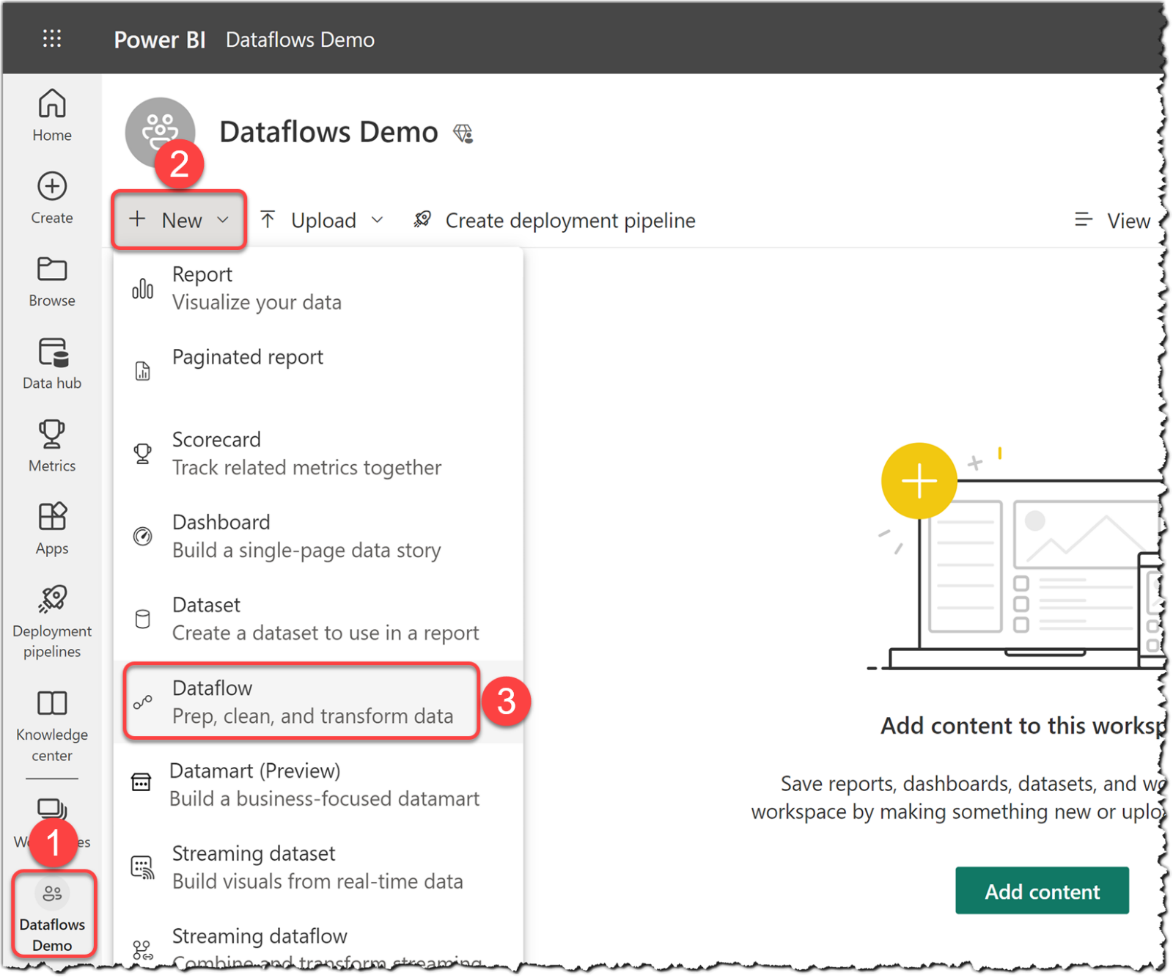
Figure 1: Creating Dataflows in the Power BI service
Dataflows are not available in Personal Workspaces (My Workspace).
We have one of the following options:
- Define new tables
- Link tables from other Dataflows
- Import Model
- Attach a Common Data Model folder (preview)
The following image shows the preceding options:
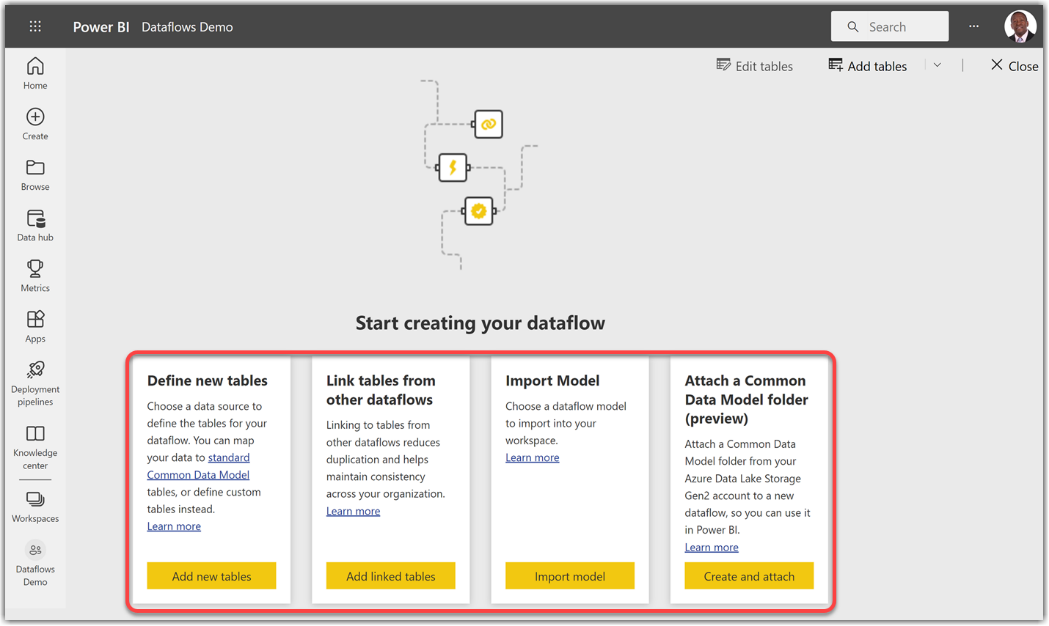
Figure 2: Available option to start creating a new Dataflow
As the preceding image shows, all options to create a new Dataflow are available to start creating a new Dataflow; however, if the Workspace is not Premium, we can still create linked tables and computed tables, but we cannot refresh the Dataflow. The following sections show how to create new tables, linked tables, computed tables, and import models. We do not discuss Attach a Common Data Model folder because it is in preview and has not been released yet.
Create new entities
So far, we have navigated to the desired Workspace. Now we want to create tables in the Dataflow. To create a new table from the options available (as shown in Figure 3), we follow these next steps:
- Click Add new tables button, as illustrated in the following image:
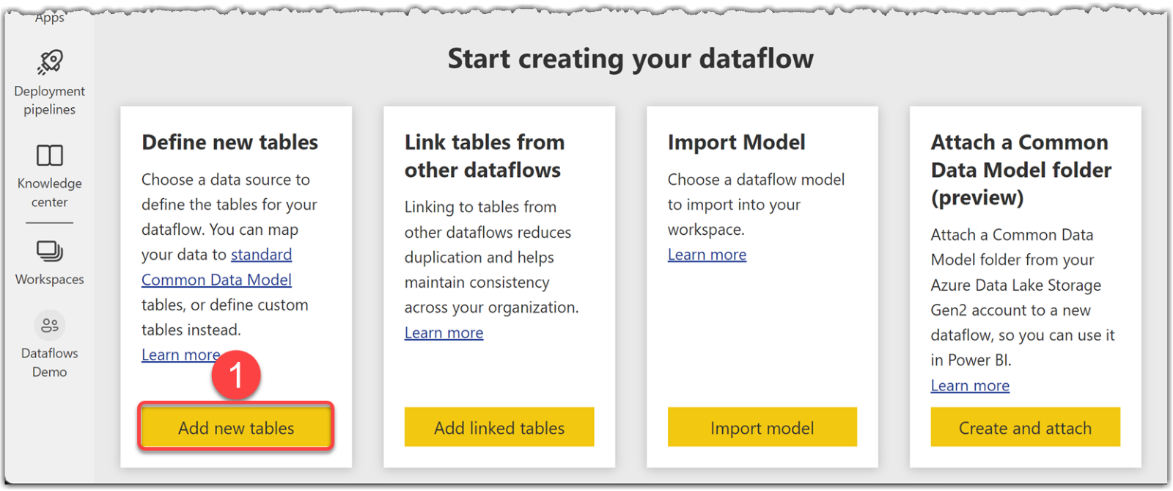
Figure 3: Adding new tables within a Dataflow
- Select any desired data source connector, as illustrated in the following image:
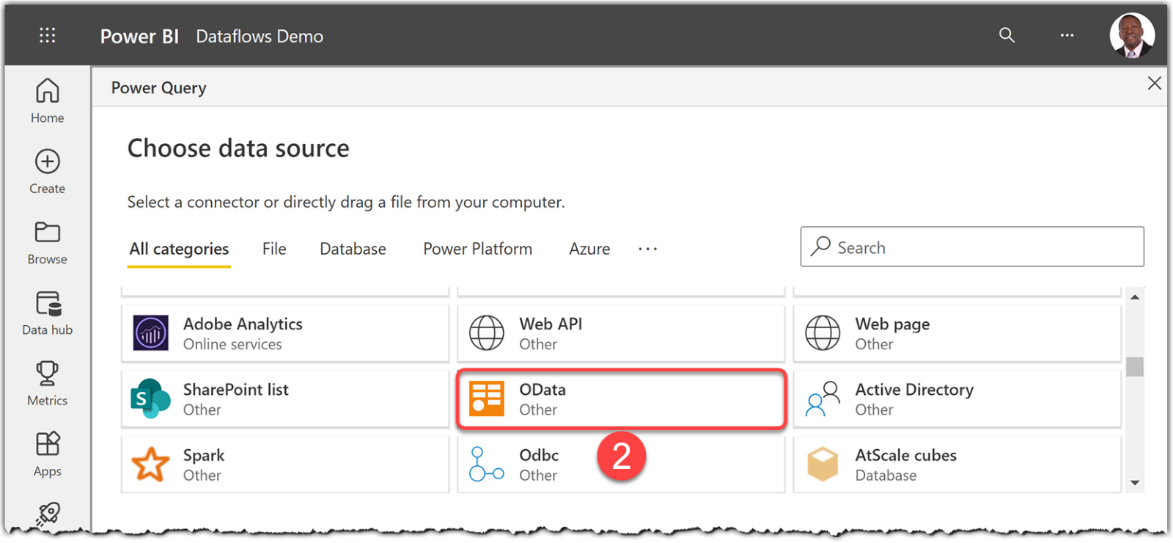
Figure 4: Selecting a data source connector
- Fill in the Connection settings fields.
- Click Next.
The preceding steps are highlighted in the following image:
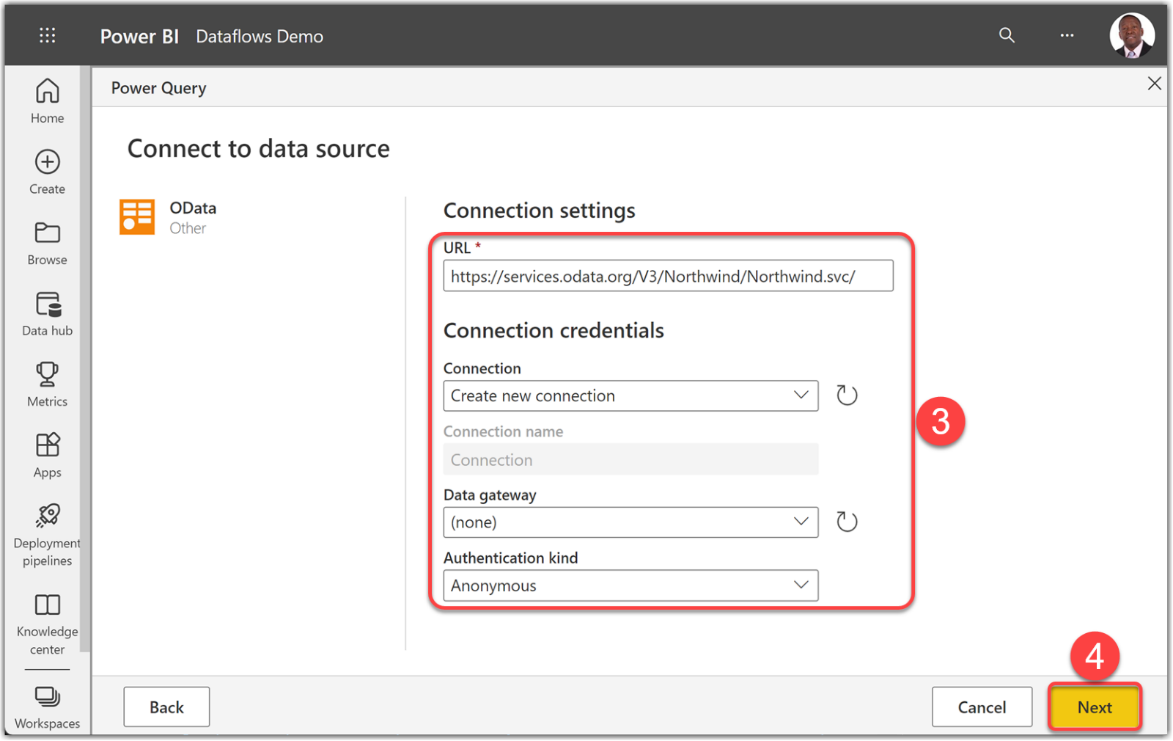
Figure 5: Filling in the Connection settings fields
- Select tables from the Choose data pane from the Power Query form. Depending on the selected data source, you may see a different form. We used a Northwind OData sample available here.
- Click Transform data.
The preceding steps are highlighted in the following image:
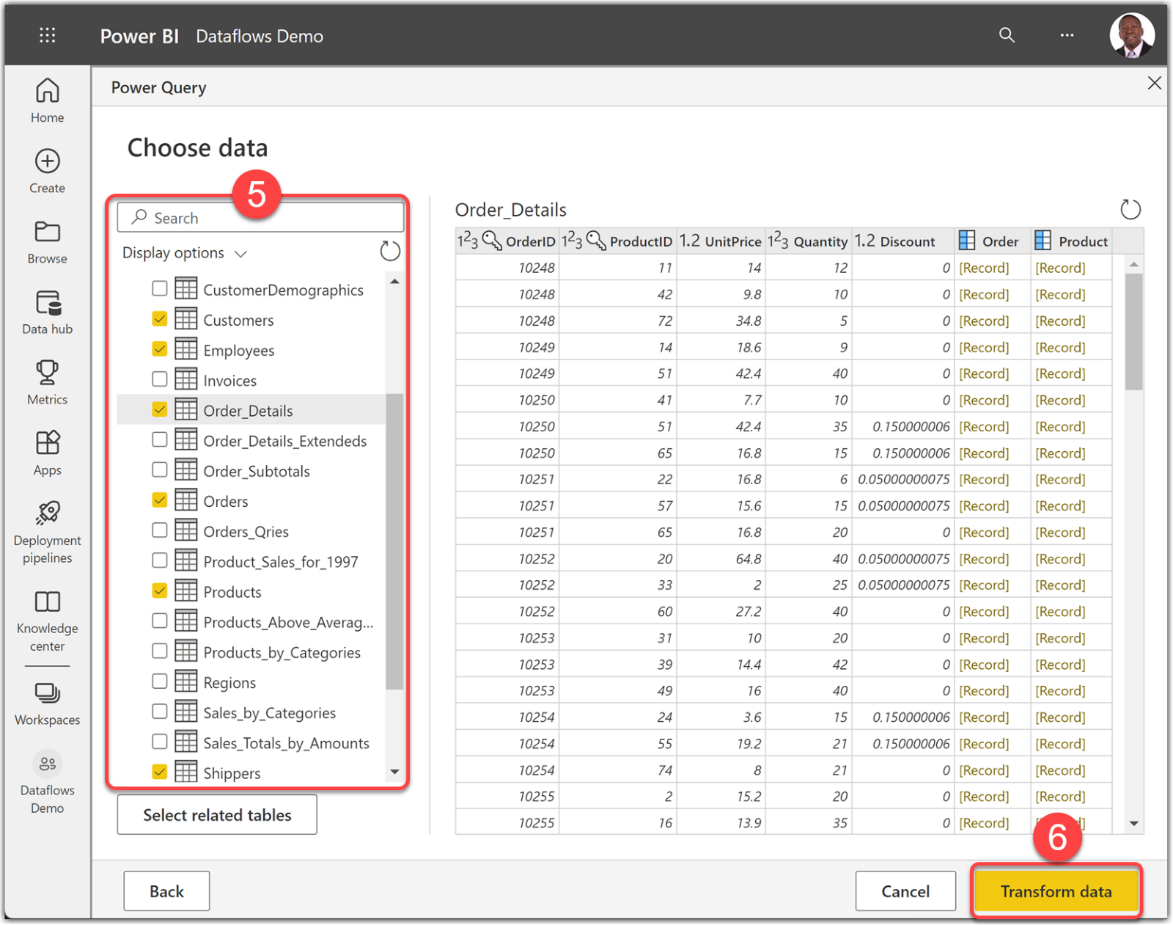
Figure 6: Power Query – Choose data form when creating a new Dataflow
If we select an on-premises data source, we need to select an up and running on-premises Data Gateway.
Summary
We have now created a Dataflow within the Power BI Service and subsequently create new entities, or tables. By following the step-by-step instructions, users can easily set up and manage their Dataflows, leveraging various data source connectors and transforming data using Power Query. The importance of selecting the appropriate workspace type has been highlighted, ensuring access to all available options.
The post How to create a Dataflow within the Power BI Service appeared first on Datafloq.

