ClickUp is one of the best free project management software options around and helps teams collaborate and organize their work. One key feature is the ability to send and receive emails directly from tasks using ClickUp emails.
ClickUp emails help you eliminate constant switching between apps and tools as you communicate and update projects. You can easily send emails from ClickUp while you’re still on the task page of your ClickUp account. It’s one of many user-friendly features and easy integrations that make ClickUp competitive with the best project management software.
Key Takeaways: ClickUp Emails
- ClickUp emails help you make the best of your time spent communicating with your team by centralizing and linking your emails to corresponding tasks.
- ClickUp’s free plan allows up to 100 users per email, whereas the Unlimited plan has no cap.
- You can use ClickUp emails for a number of functions including integrating replies on a thread, receiving notifications for responses, adding email signatures and sending emails directly from the platform.
Keep reading to learn how to make communication more reliable and accessible by integrating ClickUp with your email account. You can also read more about how to use ClickUp in our full ClickUp review.
-
ClickApp supports Outlook IMAP, Gmail and Office365.
-
No, guests cannot use the email ClickApp and, as a result, cannot use the emails function in ClickUp.
-
Yes, you can build and access email templates from the “templates” section in email settings.
How to Enable ClickUp Emails
Let’s start by learning how to enable email in your ClickUp account, then link it with your regular email account to send and receive emails. Only owners or admins of a workspace can enable ClickUp emails can be enabled only by the owners or admins of the workspace.
- Accessing ClickApps
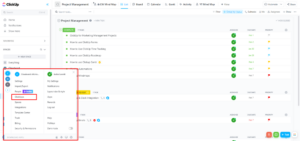
On the homepage of your ClickUp account, click on the profile/avatar icon at the bottom left of your screen, then select “ClickApps” from the menu.

- Enabling Email
Click on the search bar and type “email.” Enable email by clicking on the toggle button at the bottom of the Email feature card. You can enable emails for all spaces or choose specific spaces.

- Integrating Replies With Emails
When sending emails from a ClickUp task, you can choose to have replies displayed as comments on that same task. Enable the option “post replies to emails as threaded comments instead of new comments” to enable this email automation.

{“@context”:”https:\/\/schema.org”,”@type”:”HowTo”,”name”:”How to Enable ClickUp Emails”,”description”:”These steps show how to enable ClickUp emails.”,”totalTime”:”P00D03M00S”,”supply”:0,”tool”:0,”url”:”https:\/\/www.cloudwards.net\/how-to-use-clickup-emails\/#how-to-enable-clickup-emails”,”image”:{“@type”:”ImageObject”,”inLanguage”:”en-US”,”url”:”https:\/\/www.cloudwards.net\/wp-content\/uploads\/2023\/03\/How-to-Use-ClickUp-Emails.png”},”step”:[{“@type”:”HowToStep”,”name”:”Accessing ClickApps”,”position”:1,”url”:”https:\/\/www.cloudwards.net\/how-to-use-clickup-emails\/#accessing-clickapps”,”itemListElement”:{“@type”:”HowToDirection”,”text”:”On the homepage of your ClickUp account, click on the profile\/avatar icon at the bottom left of your screen, then select \u201cClickApps\u201d from the menu.\n”},”image”:{“@type”:”ImageObject”,”inLanguage”:”en-US”,”url”:”https:\/\/www.cloudwards.net\/wp-content\/uploads\/2023\/03\/accessing-clickapps.png”}},{“@type”:”HowToStep”,”name”:”Enabling Email”,”position”:2,”url”:”https:\/\/www.cloudwards.net\/how-to-use-clickup-emails\/#enabling-email”,”itemListElement”:{“@type”:”HowToDirection”,”text”:”Click on the search bar and type \u201cemail.\u201d Enable email by clicking on the toggle button at the bottom of the Email feature card. You can enable emails for all spaces or choose specific spaces.\n”},”image”:{“@type”:”ImageObject”,”inLanguage”:”en-US”,”url”:”https:\/\/www.cloudwards.net\/wp-content\/uploads\/2023\/03\/enabling-emails.png”}},{“@type”:”HowToStep”,”name”:”Integrating Replies With Emails”,”position”:3,”url”:”https:\/\/www.cloudwards.net\/how-to-use-clickup-emails\/#integrating-replies-with-emails”,”itemListElement”:{“@type”:”HowToDirection”,”text”:”When sending emails from a ClickUp task, you can choose to have replies displayed as comments on that same task. Enable the option \u201cpost replies to emails as threaded comments instead of new comments\u201d to enable this email automation.\n”},”image”:{“@type”:”ImageObject”,”inLanguage”:”en-US”,”url”:”https:\/\/www.cloudwards.net\/wp-content\/uploads\/2023\/03\/integrating-replies-with-emails.png”}}]}
How to Link Your Email Account With ClickUp
Before you can send, receive or take actions with ClickUp emails, you need to sync an email account to your ClickUp account.
- Accessing the Comment Section
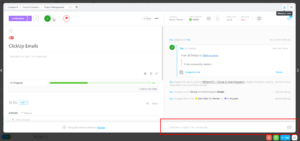
Go to your space and open a ClickUp task from any of your preferred views by clicking on it. On the bottom right side of the pop-up window, click on the gray text that reads “comment or type “/” for commands.”

- Linking an email account
After clicking on the box, the typing area for a new comment will expand and display multiple options. In the bottom-right corner (by the “comment” button), you’ll see an email icon on the left and a chat icon on the right. Click on the email icon, then click “link an email” in the To section of the email that appears.

- Choosing an Email Provider
ClickUp integrates with four email providers: Outlook, IMAP, Gmail and Office365. For this tutorial, we’ll go with Gmail. Click on “sign in with Google.”

- Signing In and Allowing Access
From the list of accounts, click the email address you use for work. A pop-up window will appear. Click “allow” at the bottom right corner and the chosen account will integrate with the emails ClickApp.

- Setting up the Sender’s Name and Email Accessibility
After linking your email, a pop-up titled “email settings” appears on your screen. Here, you can manage emails under the “email accounts” tab. The name you set under “send email as” will be displayed as the sender in the inbox of your recipients.

How to Create and Use ClickUp Email Templates
If you regularly communicate with your team about task updates and client requirements, you can write and use your own templates under the “templates” tab.
- Adding a New Template
On the email settings window, go to the “templates” tab. Click on “+ add template” to create a preset template for different email types you regularly use in different scenarios.

- Creating a New Template
Set a name for your template, then type the subject and the email content. You can change the accessibility of the template by choosing one of the options under “share with.” Click the “create” button to create and save the template.

- Modifying an Existing Template
The “templates” tab shows a list of templates you’ve created and saved, plus any that other members have shared with you. When you hover your cursor over the enlisted templates, a pen icon (edit) and a trash icon (delete) appear on the right side. You can make changes to an existing template or delete it altogether.

How to Send Emails From Inside a ClickUp Task
Once you have linked your email account with ClickUp, set up your signatures and built any templates you need, you’re all set to use email in ClickUp during your day-to-day work.
You can create tasks using emails as a trigger or condition. Visit how to create ClickUp recurring tasks to learn the trick.
- Typing an Email From Within a Task
Open the email section from the comment box and choose your sender email in the “from” section. If the recipient is one among the 100 contacts you chose to transfer to ClickUp, you can type just the recipient’s name in the “to” section. Otherwise, you’ll have to manually add in their email ID.

- Using a Template
You can use one of your own templates instead of drafting a new email. To do this, click on the star wand icon below the email body. Then, choose a template you want to use, or start a new template by clicking on “+ add email template.”

How to Manage Email Permissions Settings
ClickUp lets you control who can send or add emails. You can only use these custom email permissions for admins and members under the Business Plus and Enterprise plans.
- Accessing Advanced Permissions
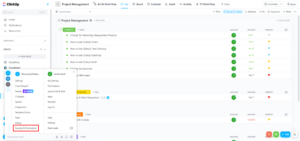
On the homepage of your ClickUp account, click on the profile/avatar icon at the bottom left of your screen and click on “security & permissions.”

- Managing Permissions
Scroll down to the “advanced permissions” section and you’ll see email permissions at the bottom of the “manage actions” subsection. You can decide which members and admins can send email or add an email account using the email ClickApp. Make sure you only grant access to team members you trust to be sending emails under your name.

Final Thoughts
If you are starting a new business, consider using ClickUp. It’s one of the best project management programs for startups and comes with a wide range of tools for a variety of use cases.
We hope this guide has covered all the basics you need to get started with email in ClickUp. Feel free to check out our ClickUp review for more information on the platform.
What was your favorite ClickUp emails function? What’s your opinion on ClickUp as a project management platform? Share your thoughts and ideas below and, as always, thank you for reading.
The post How to Use ClickUp Emails in 2023: The Basics Explained appeared first on Cloudwards.


