Using a mind map is one of the best ways to brainstorm, visualize outlines and reorganize project layouts. With ClickUp mind maps, you can create and organize tasks for every part of your project. You can use your mind map to gain a bird’s-eye-view of everything or zero in on certain areas for more focused work.
Key Takeaways: Create Mind Maps in ClickUp
- ClickUp mind maps are user-friendly and very effective for strategic planning and organizing.
- The 100-use limitation in the free plan and unlimited plan is cumulative throughout the workspace and does not reset after a set interval. Moreover, guests can create a mind map only if they have the “edit” permission.
- Get ClickUp’s Business plan or above to gain unlimited access to mind map creation.
The right mind mapping software can make your project easier to manage and more effective overall. It’s also a great collaboration tool, giving team members the chance to contribute ideas towards the project. ClickUp offers real-time data and collaboration tools, like Gantt charts, helping brainstorm complex projects.
If you want to learn more of the ClickUp basics, read our ClickUp Review to learn more about the features of this easy-to-use project management software.
-
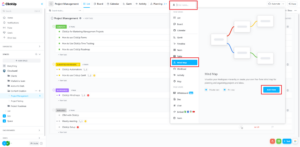
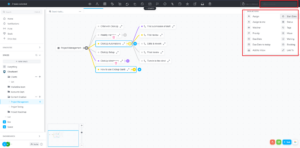
Click the “+ view” button on the taskbar and click on “mind map.”
-
ClickUp offers access to mind maps in all plans, but the free and unlimited plans are restricted to 100 uses.
Benefits of Using ClickUp Mind Maps
Creating mind maps with ClickUp gives you a complete overview of all your projects. You can zoom out (“Ctrl” and “scroll down” buttons) to see a broad view, or get detailed information by zooming in (“Ctrl” and “scroll up” buttons). Let’s take a look at some of the benefits of using ClickUp mind maps.
1. Understand Complex Projects
Strategic planning is an important factor for success in a business, be it a multinational corporation (MNC) or a startup. A ClickUp mind map shows you your entire workflow on one screen, allowing you to focus and assess every individual task. ClickUp mind maps are simple enough to work as great memory recall tools.
2. Spark Creativity
Ideas constantly flow through our minds and bursts of inspiration can hit at any time. When you can see the entire project and its workflow on your screen, with access to every individual folder and list, you won’t just gain new inspiration — you’ll be able to jot ideas down and immediately see their impact on other plan components.
3. Improve Productivity
Since ClickUp mind maps reduce the hassle of navigation by bringing all of your data into one place, you can improve productivity and make quicker executive decisions. You don’t have to analyze the entire project every single time a decision needs to be made. Instead, the mind map serves as a repository that makes data access easy.
How to Create a ClickUp Mind Map
ClickUp mind maps can be created for any space, folder or individual list. Follow these steps to create a mind map.
- Select a Folder or List
On the homepage of your ClickUp account, under the “spaces” section of your sidebar, click the folder or list in which you’d like to create a mind map. Create a mind map view in that folder or list by clicking on the “+ view” button in the upper taskbar.

- Create a Mind Map
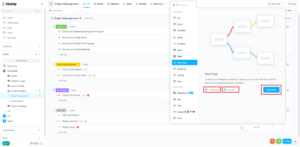
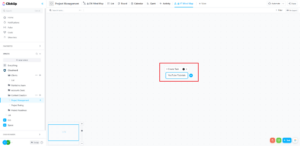
From the dropdown menu, click on “mind map.” Name your mind map by clicking on “Enter name…” in gray text at the top of the drop down menu, over the task bar. You can rename your mind map anytime by clicking on the ellipsis icon (three horizontal dots) of the mind map tab.

- Adjust Views: Private or Pinned
You can also enable the “private view” option to keep the mind map private. When you do this, a lock icon will appear to the left of the name of your mind map. You can change the sharing permissions and accessibility settings at any time.
Enabling the “pin view” option pins your mind map to the left side of the taskbar. A small pin icon on the top left of the tab indicates that the mind map view has been pinned.

- Choose a Structure
ClickUp gives you two structure options: “tasks” and “blank.” If you choose tasks, a mind map containing all of the tasks and subtasks of the selected folder or list will automatically be created. Under this mode, you can navigate through, create, edit and delete tasks, or rearrange the nodes (changing the source location of a task or list).
Choosing the blank option allows you the freedom of creating and designing an idea from the ground up. Any number of new nodes can be created, and they won’t be automatically connected to any tasks.

How to Use Mind Maps With Task Mode
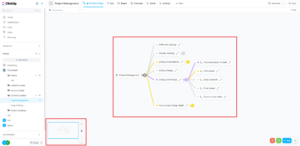
In the tasks mode, the mind map view will display all the tasks under the selected folder or list. Tasks mode lets you identify, organize and rearrange nodes (which represent tasks and subtasks).
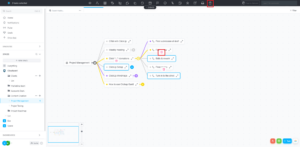
You can move the task to another folder or list by clicking and dragging the node. To expand and collapse the tasks and subtasks, click on the encircled “+” and “-” icons, respectively.
- Customizing the Tasks View
Click and drag anywhere on the map to move it around your screen. You can see its position on the bottom left minimap screen. The nodes in tasks mode are the tasks and subtasks in the selected folder or list. The color of every node reflects the status of the task.

- Editing the Tasks
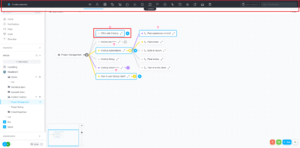
The mind map view lets you access and use all the tools and features you’d get from any other view. When you click on a task, a rounded sky-blue rectangle will display around it. A temporary taskbar will appear at the top of your screen over the current taskbar, allowing you to perform any required activity.
You can also select and manage tasks by pressing the “Ctrl” button and left-clicking on the other tasks. The number of selected tasks is displayed at the left of the temporary overlapping taskbar. To rename any task, double-click on the name.

- Customizing Task Actions
You can also customize task actions for the selected task(s), just like you can in any other view. You can assign them to your team members or involve your client as a watcher. You can also set priorities and due dates, and create tags and statuses for different task types.
With ClickUp time tracking, you can track the progress of your entire project and its component tasks. You can also sequence tasks using dependencies. For example, when you select “blocking” for a particular task, subsequent tasks cannot be initiated unless the task blocking them is complete. If you do not wish to restrict the task entirely, you can choose “waiting on” instead.

- Customizing Display Options
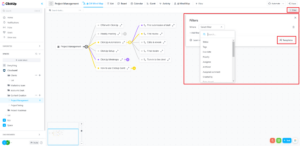
You can also filter which tasks and subtasks the mind map displays. Click the “filter” button on the top right of the screen (just below the taskbar) and choose how you’d like to filter the nodes.
You can add more filters by clicking on “+ add filter” or use a pre-existing template from your workspace. You can customize your filters with task action(s), and save them by clicking on “templates,” then “save active filters.” You can give a custom name for different kinds of filters and they’ll apply to only your user view. Saved filters can be used in any view.

- Customizing Individual Tasks
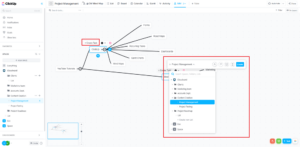
To access full customization options for an individual task, click on the two diagonally opposite arrows on the right side of the task or subtask. A pop-up window showing all options for customization will show up on the screen.
On the right side of the pop-up window, you can see the activity log of the open task. You can add comments for individual tasks and subtasks or set any other task actions. Click on the “X” button to close the pop-up window.

How to Use Mind Maps With Blank Mode
The “blank” mode refers to creating a mind map from scratch, to create rough charts and plans of your ideas. For example, if creating a YouTube channel is your main idea, this structure is perfect for brainstorming and planning various concepts.
- Creating a Mind Map From Scratch
Upon creating a blank mind map, a simple text box (with the text “root node”) will appear on your screen. You can put your main idea into this free space.

- Creating Tasks From Nodes
The nodes you create remain as placeholders on your mind map screen until you convert them into tasks. When you’re ready to convert nodes to tasks, select the nodes you want to convert and click on the “+ create task” button. Then, choose the location where you would like the task to appear.

- Organizing Your Mind Map
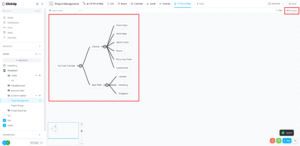
The nodes created in a blank mind map can become disorganized as you work through your ideas. Click on the “re-layout” button in the top right corner to automatically rearrange all nodes in an orderly fashion.

How to Delete ClickUp Mind Maps
After you create multiple mind maps for different purposes, you can delete the ones you no longer need. You can either delete the entire mind map or delete tasks individually.
- Deleting a Mind Map Task Individually
Select the task(s) you want to delete. You can delete multiple tasks by clicking on the trash icon in the temporary taskbar with the unneeded tasks selected, or delete individual tasks by clicking on the trash icon above each selected task. The deleted task(s) move to trash, where they’ll be erased for good after 30 days. You can restore any task before that time elapses.

- Deleting an Entire Mind Map
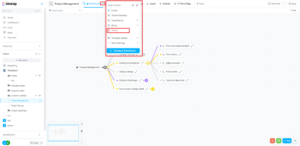
Click on the mind map tab you wish to delete. The tab being viewed is displayed with sky-blue text and a bold underline. Click on the “…” icon on the right side of the selected tab. A drop down list will appear on the screen with various options. Click the “delete” button preceded by the trash icon.

Final Thoughts: ClickUp Mind Maps
ClickUp comes with a feature-loaded mind mapping tool that is suitable for organizing projects, creating and assigning tasks, planning strategies and sharing your main ideas.
We hope this article covers all the bases on how to create and use ClickUp mind maps. There are many time management tools available, but ClickUp mind maps is a great one if you’re keen on integrating a visual approach.
What mind mapping tool are you currently using? Did you see any specific feature to your liking? Would you like us to cover any other angles? Please share your thoughts in the comments below. Happy mind mapping!
The post How to Use ClickUp Mind Maps in 2023: Basic ClickUp Tutorials appeared first on Cloudwards.


