ClickUp is a popular project management software that comes equipped with robust automation features. ClickUp automations let you automate static and repetitive tasks while you focus on the dynamic and manual aspects of your company.
Not every business follows the same kind of procedure. Each business is unique and so are their requirements. With the help of ClickUp automations, you can determine how a certain set of repetitive tasks should be executed. You can also add conditions to make the automations more specific.
Key Takeaways:
- The automations tool in ClickUp helps you take complete control and have a proper overview of all your business projects.
- You can easily trigger status changes with something as simple as a start date.
- Use ClickUp to collaborate with other tools in your project and widen the scope of your team’s flexibility and efficiency.
- Automations are available in all plans except for guest accounts. However, actions have monthly limitations depending upon the plan and more actions can be purchased in paid plans.
ClickUp automations help you effectively manage tasks by creating and processing automations with pre-defined triggers and actions. You can customize and control actions to the extent of every individual task and their nested subtasks. In this guide, you’ll learn how to utilize ClickUp’s features for automating your complex workflow.
-
Yes, automations are a part of ClickApps in ClickUp. You can have your own custom fields like due dates, priorities, statuses and tags to make your workflow more efficient.
-
To check all active and inactive automations, simply click on the “automate” button in the top-right corner with the bot face icon on its left. Then click on the “manage” tab to see the list of all automations in ClickUp.
-
To start automating tasks with ClickUp, you need to: establish a proper workflow procedure and identify static procedures, prepare instructions for every department with test case examples, and enable automations from ClickApps and input condition-triggered actions to start automating repetitive tasks.
{“@context”:”https:\/\/schema.org”,”@type”:”FAQPage”,”mainEntity”:[{“@type”:”Question”,”name”:”Does ClickUp Have Automations?”,”acceptedAnswer”:{“@type”:”Answer”,”text”:”
Yes, automations are a part of ClickApps in ClickUp. You can have your own custom fields like due dates, priorities, statuses and tags to make your workflow more efficient.\n”}},{“@type”:”Question”,”name”:”How Do I See All Automations in ClickUp?”,”acceptedAnswer”:{“@type”:”Answer”,”text”:”
To check all active and inactive automations, simply click on the \u201cautomate\u201d button in the top-right corner with the bot face icon on its left. Then click on the \u201cmanage\u201d tab to see the list of all automations in ClickUp.\n”}},{“@type”:”Question”,”name”:”How Do I Start Automating Tasks?”,”acceptedAnswer”:{“@type”:”Answer”,”text”:”
To start automating tasks with ClickUp, you need to: establish a proper workflow procedure and identify static procedures, prepare instructions for every department with test case examples, and enable automations from ClickApps and input condition-triggered actions to start automating repetitive tasks.\n”}}]}
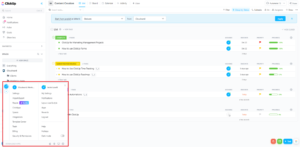
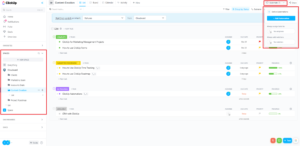
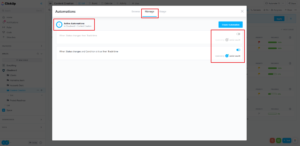
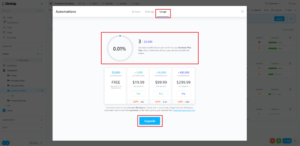
ClickUp automations give you the flexibility of choosing which tasks are done automatically. You can manage tasks effectively by getting them assigned automatically to the team member with the required expertise. You can also use one of ClickUp’s pre-existing automation templates to effectively manage your time and get ahead of your processes. A trigger is an event or a condition that initiates an action or chain of actions. In ClickUp, triggers refer to the options in the “when” dropdown list that comes up while creating automation commands. The criteria that determine when and how a trigger is activated are called conditions. ClickUp conditions can be added by clicking on the “+” icon under the “when” dropdown list. It includes all custom fields and watchers (those who can access and view the activities). Keep in mind that conditions have to be set before the trigger for actions to happen successfully. Actions are the events that happen when a trigger occurs in a way that fulfills the given conditions. In ClickUp, actions are chosen from the dropdown list labeled “then.” If the trigger and conditions are both met, the assigned action takes place. For example, within ClickUp, you can set up an automation to start tracking the time of a task when the status is changed from “active” to “in progress.” You can also add a specific condition to assign the task to someone if the task’s priority is equal to “high.” So, unless the priority criterion is met, only the time shall be tracked when there is a change in task status. Automation is one of many ClickApp features that must be enabled before you can access and use it. You can also save manually created automations for the future and use them any time you want. We’ll show you step-by-step how you can set up automations for your ongoing or new projects and activities. On the homepage of your ClickUp account, click on the profile/workspace icon at the bottom left of your screen and click on the “ClickApps” option. You can also access ClickApps by clicking on the workspace settings. ClickUp automations is usually one of the first ClickApps displayed on the screen. However, if you don’t see it, scroll through the apps, or click on the search bar and type “automation.” Enable the feature by clicking on the toggle button at the bottom of the feature card. Navigate to a workspace and a folder or project where you’d like to use the automation tool. Click on the “automate” button in the top-right corner with the bot face icon on its left. In the dropdown menu that appears, you can see the number of active automations and add assignees and viewers to all actions. Click on the “+ add automation” button to create triggers and actions. Under the “browse” tab in the automations pop-up window, you can create conditions based on categories and integrate them with other apps. Creating a condition (marked as “C”) is optional. Conditions help you execute actions based on specific values. On the “when” side, you can create a trigger (marked as “T”) that will start an automation. On the “then” side, you can finalize an action (marked as “A”) to take place upon an instance of the trigger that fulfills the condition. Finally, click on the “create” button at the bottom to save and create the automation. Under the “manage” tab, you can track, manage and edit automations. You can enable or disable automations by clicking on the toggle button. You can also see the last person who created or edited the automation. Under the “usage” tab, you can keep track of the number of automations used. Usage alerts are sent to the admins and owners of the workspaces when the action usage reaches 90% and another alert upon reaching 100%. The count resets at the start of every month. You can always purchase additional actions depending on your needs. {“@context”:”https:\/\/schema.org”,”@type”:”HowTo”,”name”:”How to Set Up ClickUp Automations: A Basic Guide”,”description”:”These steps show how to set up ClickUp automations.”,”totalTime”:”P00D05M00S”,”supply”:0,”tool”:0,”url”:”https:\/\/www.cloudwards.net\/clickup-automations\/#how-to-set-up-clickup-automations-a-basic-guide”,”image”:{“@type”:”ImageObject”,”inLanguage”:”en-US”,”url”:”https:\/\/www.cloudwards.net\/wp-content\/uploads\/2023\/01\/How-to-Use-ClickUp-Automations.png”},”step”:[{“@type”:”HowToStep”,”name”:”Access ClickApps”,”position”:1,”url”:”https:\/\/www.cloudwards.net\/clickup-automations\/#access-clickapps”,”itemListElement”:{“@type”:”HowToDirection”,”text”:”On the homepage of your ClickUp account, click on the profile\/workspace icon at the bottom left of your screen and click on the \u201cClickApps\u201d option. You can also access ClickApps by clicking on the workspace settings.\n”},”image”:{“@type”:”ImageObject”,”inLanguage”:”en-US”,”url”:”https:\/\/www.cloudwards.net\/wp-content\/uploads\/2023\/01\/accessing-clickapps-1.png”}},{“@type”:”HowToStep”,”name”:”Enable Automation”,”position”:2,”url”:”https:\/\/www.cloudwards.net\/clickup-automations\/#enable-automation”,”itemListElement”:{“@type”:”HowToDirection”,”text”:”ClickUp automations is usually one of the first ClickApps displayed on the screen. However, if you don\u2019t see it, scroll through the apps, or click on the search bar and type \u201cautomation.\u201d\u00a0 Enable the feature by clicking on the toggle button at the bottom of the feature card.\n”},”image”:{“@type”:”ImageObject”,”inLanguage”:”en-US”,”url”:”https:\/\/www.cloudwards.net\/wp-content\/uploads\/2023\/01\/enabling-automation.png”}},{“@type”:”HowToStep”,”name”:”Select the Space and Folder”,”position”:3,”url”:”https:\/\/www.cloudwards.net\/clickup-automations\/#select-the-space-and-folder”,”itemListElement”:{“@type”:”HowToDirection”,”text”:”Navigate to a workspace and a folder or project where you\u2019d like to use the automation tool. Click on the \u201cautomate\u201d button in the top-right corner with the bot face icon on its left. In the dropdown menu that appears, you can see the number of active automations and add assignees and viewers to all actions. Click on the \u201c+ add automation\u201d\u00a0button to create triggers and actions.\n”},”image”:{“@type”:”ImageObject”,”inLanguage”:”en-US”,”url”:”https:\/\/www.cloudwards.net\/wp-content\/uploads\/2023\/01\/choosing-the-space-and-folder.png”}},{“@type”:”HowToStep”,”name”:”Create Conditions “,”position”:4,”url”:”https:\/\/www.cloudwards.net\/clickup-automations\/#create-conditions”,”itemListElement”:{“@type”:”HowToDirection”,”text”:”Under the \u201cbrowse\u201d tab in the automations pop-up window, you can create conditions based on categories and integrate them with other apps. Creating a condition (marked as \u201cC\u201d) is optional. Conditions help you execute actions based on specific values.\n”},”image”:{“@type”:”ImageObject”,”inLanguage”:”en-US”,”url”:”https:\/\/www.cloudwards.net\/wp-content\/uploads\/2023\/01\/creating-conditions.png”}},{“@type”:”HowToStep”,”name”:”Create Triggers and Actions”,”position”:5,”url”:”https:\/\/www.cloudwards.net\/clickup-automations\/#create-triggers-and-actions”,”itemListElement”:{“@type”:”HowToDirection”,”text”:”On the \u201cwhen\u201d side, you can create a trigger (marked as \u201cT\u201d) that will start an automation. On the \u201cthen\u201d side, you can finalize an action (marked as \u201cA\u201d) to take place upon an instance of the trigger that fulfills the condition. Finally, click on the \u201ccreate\u201d button at the bottom to save and create the automation.\n”},”image”:{“@type”:”ImageObject”,”inLanguage”:”en-US”,”url”:”https:\/\/www.cloudwards.net\/wp-content\/uploads\/2023\/01\/creating-triggers-and-actions.png”}},{“@type”:”HowToStep”,”name”:”Manage and Edit Automations”,”position”:6,”url”:”https:\/\/www.cloudwards.net\/clickup-automations\/#manage-and-edit-automations”,”itemListElement”:{“@type”:”HowToDirection”,”text”:”Under the \u201cmanage\u201d tab, you can track, manage and edit automations. You can enable or disable automations by clicking on the toggle button. You can also see the last person who created or edited the automation.\n”},”image”:{“@type”:”ImageObject”,”inLanguage”:”en-US”,”url”:”https:\/\/www.cloudwards.net\/wp-content\/uploads\/2023\/01\/managing-automations-1.png”}},{“@type”:”HowToStep”,”name”:”Track Automation Usage”,”position”:7,”url”:”https:\/\/www.cloudwards.net\/clickup-automations\/#track-automation-usage”,”itemListElement”:{“@type”:”HowToDirection”,”text”:”Under the \u201cusage\u201d tab, you can keep track of the number of automations used. Usage alerts are sent to the admins and owners of the workspaces when the action usage reaches 90% and another alert upon reaching 100%. The count resets at the start of every month. You can always purchase additional actions depending on your needs.\n”},”image”:{“@type”:”ImageObject”,”inLanguage”:”en-US”,”url”:”https:\/\/www.cloudwards.net\/wp-content\/uploads\/2023\/01\/checking-the-usage.png”}}]} ClickUp automations are available on all plans, including the free plan. However, this feature is not accessible to guests. Every plan has a limit on the total number of actions per month. You can purchase additional actions on paid plans if you exhaust usable actions. ClickUp is an easy-to-use project management software that comes with multiple integrations. You can integrate Bugsnag, Calendly, Email, GitHub, HubSpot and Twilio with ClickUp automations and initiate actions as you prefer. For example, if the task status is changed to “error” when the test run of a particular page is unsatisfactory, an issue can be created in your GitHub account automatically. You wouldn’t have to manually create a task in your GitHub account to reflect the issue. ClickUp automation is a simple feature that can make a difference to every person on your team. You can efficiently automate workflows by creating a designated assignee for each task based on the priority and due date of the task. Furthermore, you get multiple filter options where you can assign a specific value to a custom field to achieve precise goals. Once you have automated your workflow, you can focus more on the requirements of your clients. You can also use ClickUp forms to create tasks directly from responses to improve your team’s productivity. There’s a lot more to the project management software than automations, so check out our ClickUp review if you want to know what else it’s capable of. With the help of this guide, we hope you now understand all the necessary basics to get started with ClickUp automations. Do you feel anything has been overlooked? Would you like us to publish a guide for any other specific feature? Please comment below and share your thoughts. Thank you for reading and happy automating! The post How to Use ClickUp Automations in 2023: A Beginner’s Guide to Project Management Automation appeared first on Cloudwards.What Are ClickUp Automations and Why Use Them?
1. What Are Triggers?
2. What Are Conditions?
3. What Are Actions?
How to Set Up ClickUp Automations: A Basic Guide


Are ClickUp Automations Available on All ClickUp Plans?
Plan:
Total Actions per Month
Free Forever
100
Unlimited
1,000
Business
10,000
Business Plus
25,000
Enterprise
250,000
Can I Integrate Other Apps With ClickUp Automations?
Final Thoughts

