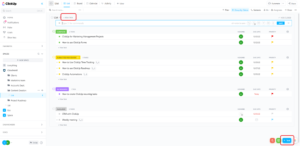
The ClickUp recurring tasks is a very useful project management tool that can come in handy in your day-to-day life. You can use it to automatically schedule repetitive tasks in your business and personal life. This article will show you how to create a new task and set recurring tasks with easy, step-by-step instructions.
Key Takeaways: Create a Recurring Task
- ClickUp recurring tasks are easy to understand and can be used for various repetitive events and tasks.
- Along with start dates, you can also set time to trigger your recurring tasks.
- Recurring tasks are available on ClickUp’s free plan but they can be seen in the calendar view only on paid plans.
When you run a business, there are certain events that need to occur regularly. These can be anything, from reviewing daily tasks, attending weekly team meetings, creating a monthly report or following up with a regular customer. These recurring tasks play a vital role in the smooth functioning of your business.
ClickUp is an easy-to-use project management tool that can help you organize recurring tasks in a scheduled manner and avoid unnecessary delays. Setting recurring tasks for your routine work can help you stay on top of your due dates. You can check out our ClickUp review for more information about recurring tasks and the service’s other features.
-
Yes, you can either set a task to recur forever at a selected recurrence interval or schedule it to recur only for a limited period of time.
-
You can upgrade to any paid plan to view all of the future recurring tasks in the calendar view.
-
Yes, download the ClickUp mobile app to create, view and edit recurring tasks on your mobile.
How to Create ClickUp Recurring Tasks
Follow these simple steps to organize your frequently recurring tasks with ClickUp.
- Creating a New Task
To create a new recurring task, simply click on the “+ task” button on the bottom right of the screen, or click on “+ new task” at the top left corner near the Menu bar (if you’re using the list view). You can also set recurrence for an existing task.

- Enabling Recurring Settings
Click on the “due date” button (calendar icon) and click “set recurring.”

- Setting Recurring Options
A dropdown menu opens up with a calendar view and recurrence settings, where you can set triggers and recurrence conditions. Select the start date on the calendar, and click on the “save” button to initiate the recurring task.

Customizing ClickUp Recurring Tasks Options
With ClickUp recurring tasks, you can manage tasks and track their progress using ClickUp’s time tracker. You can also set the time for the next recurrence of the same task after selecting the start date.
Scheduling Options
Using ClickUp’s recurring tasks can help you achieve your goals and improve your team productivity. For example, if you and your team meet weekly, you can create a task, add a task description and create subtasks so that your weekly meeting automatically schedules each week. It helps you automate your work process and keep things organized.
Moreover, if you choose to set daily task recurrence, you can set it to skip the weekends by enabling the “skip weekends” option. It’s important to note the “skip weekend” feature won’t skip non-working days or holidays that occur during the week.

ClickUp offers a daily recurrence option, as well. For example, if you are working on climate research, you can set a recurring reminder to take notes of the changes in the weather every day. Since this is a task that needs to be done daily, creating a new task with a daily recurrence schedule makes sense. This can be done with the “on schedule” option.
Triggers can be incredibly useful, as well. Rather than having a daily recurrence, you can schedule the next new task to occur only when the status of the currently open task is marked as complete. This will trigger the creation of the new task. Also, you can take additional notes in the task description.

“Create New Task” Preferences
If you want a new, ready-to-work-on task created as soon as the current task is marked complete, you can enable the “create new task” option to do just that. Furthermore, you can customize what data is ported into the new task from the old task by clicking on “options.”

Recurrence Length Options
For indefinite tasks, such as taking daily reports from your team to manage project updates, you can enable the “recur forever” option. The “repeat” option from the dropdown lets you specify how many times you want the task to recur.
Moreover, if you’re following up with a client on any particular issue, you can set the last date for the task to recur using the “end on” option from the dropdown menu.

Final Thoughts: Recurring Tasks
As a business owner, you have a lot of moving parts to manage. It’s hard to do everything on your own, and ClickUp tasks can help take some of the scheduling pressure off. With the knowledge that all your minute tasks are taken care of, you can focus on bigger things.
Recurring tasks are available on all ClickUp plans, including the free plan, and even guests can use them. However, the future recurring tasks can be viewed on the calendar only if you upgrade to a paid plan. Also keep in mind that any tasks with over 500 or more subtasks will not recur.
We hope that this guide provided sufficient information on how to get started with ClickUp recurring tasks. What app or tool are you currently using for your recurring tasks? Did you see any distinct feature in this guide that you like? Do you have any specific requirement for a new feature in mind? Comment below and share your thoughts with us. Thank you for reading.
The post How to Create ClickUp Recurring Tasks in 2023 appeared first on Cloudwards.


