Backing up your data is important, and although you should definitely use one of the best online backup services to ensure your data is safe, you don’t need one to protect your browsing profile in Chrome. This guide will show you how to backup Google Chrome and make sure nothing in the browser is lost, should your computer meet an unfortunate end.
Chrome is one of the most secure web browsers around, but that doesn’t mean your information is inherently safe if your device dies. If this happens, there’s probably a bunch of data saved in the browser that you’ll want to retrieve. This includes apps, bookmarks, favorites, extensions, browsing history, settings, themes, open tabs, autofill form content and payment methods.
If you lose access to this data, you’ll have to redownload all your extensions, re-enter your information — such as passwords and addresses — and set up your preferences again the way you like them. With your browsing history gone, you can also forget about hunting down that one article you vaguely remember reading a few weeks back.
If you’re just installing Chrome for the first time, be sure to check out our Google Chrome review to discover everything the browser can do. For now, let’s see how to make sure your browsing data is safe and secure.
-
08/20/2021
Adjusted the layout, fact checked the steps, added new images.
How to Backup Google Chrome in Browser
The easiest way to backup Google Chrome is through the browser. To do so, you must create a Google account or sign in with your existing one (find out how to change your default Google account).
How to Backup Chrome Bookmarks, History & More
- Go to Settings
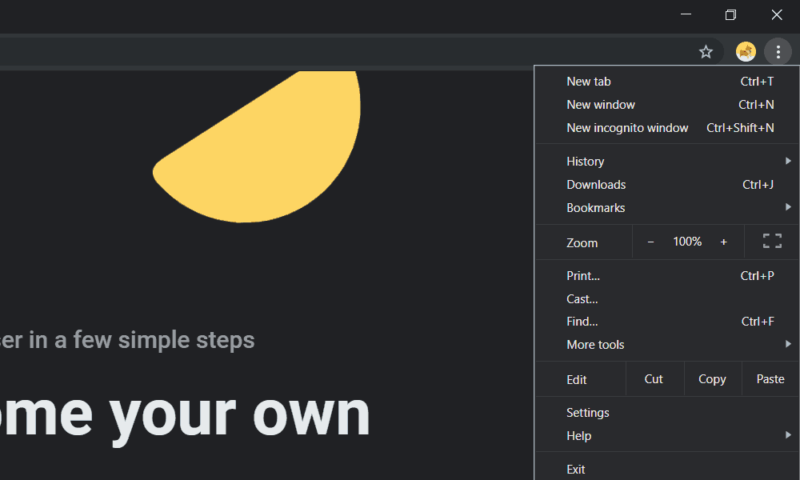
Start by clicking on the three dots in the browser’s top-right corner and then on the “settings” option near the bottom of this menu.
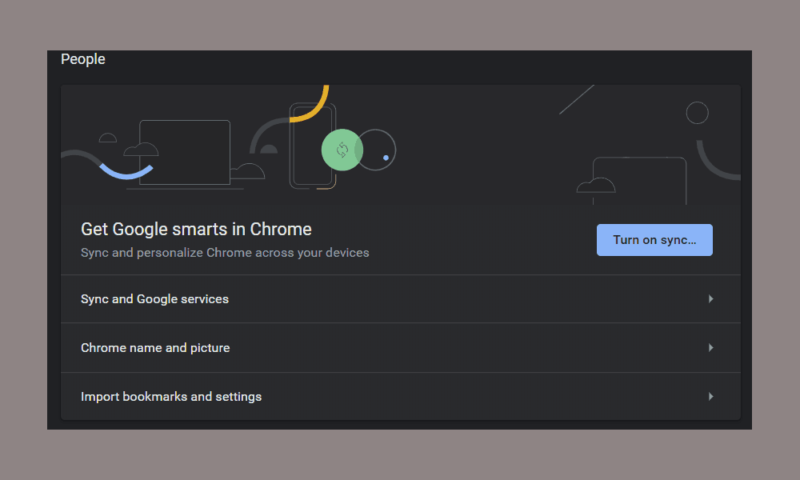
- Turn on Sync
From here, you should see a large, blue button labeled “turn on sync…” Once you click it, you’ll be taken to the Google login page.
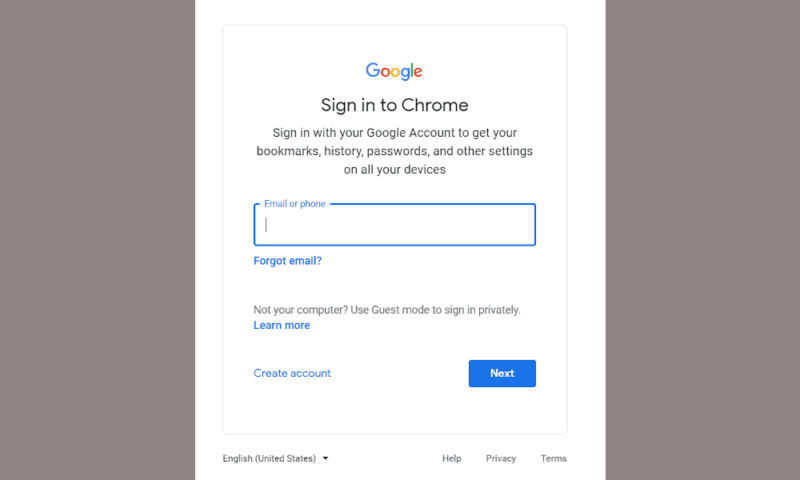
- Log in to Your Google Account or Create a New One
Here you can either log in with an existing Google account or create a new one by clicking “create account.”
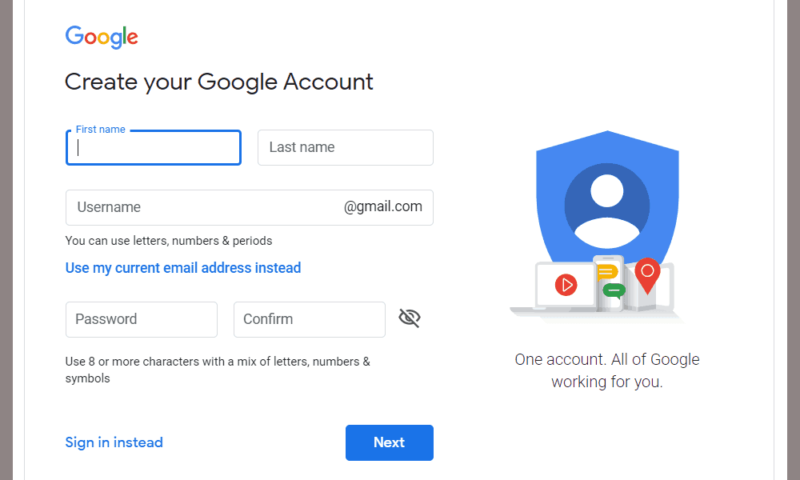
- Create a New Gmail Account
To create a new account, you’ll need to enter your name, date of birth and desired Gmail address, as well as a password (you can make Gmail your default email client if you want). Required fields are marked with an asterisk, so if there are any issues, make sure you’ve filled them in. Once your account is created, repeat the steps above to arrive at the login screen again.
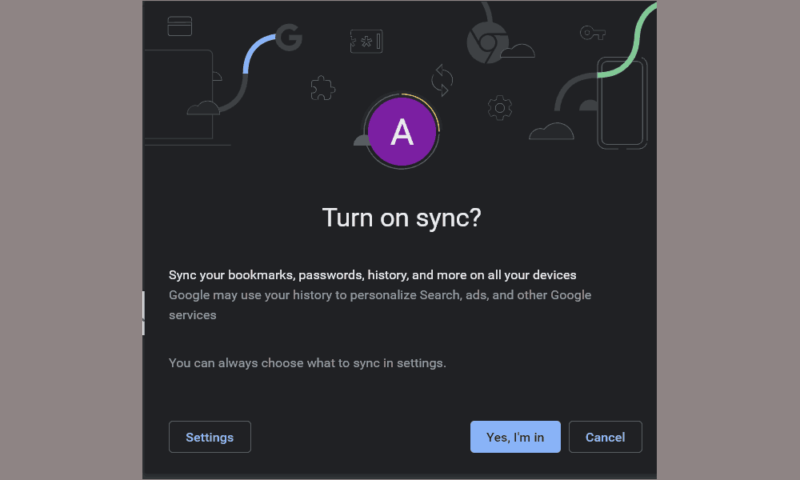
- Confirm Sync Settings
Once you are signed in to your account in the Chrome browser, return to the settings menu and click “turn on sync” again. You’ll have to confirm that you mean to do so, then click “yes, I’m in.”
- Decide What to Sync
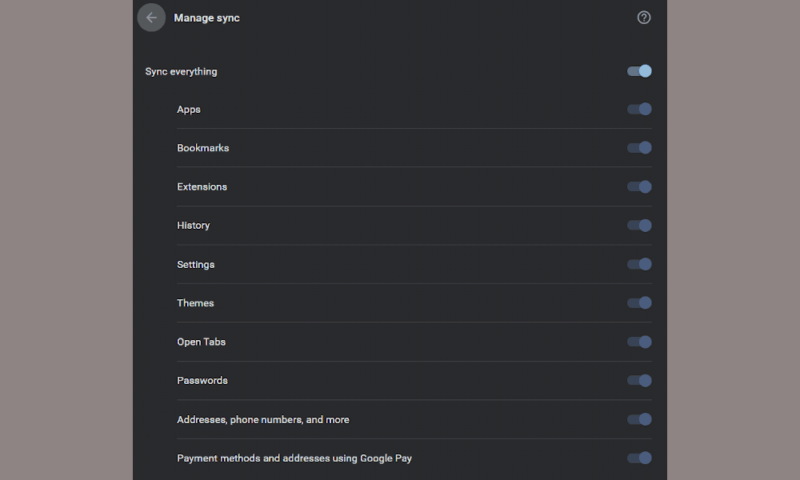
From here, click “manage sync” to see what information will transfer. You can either choose to sync everything or pick and choose from the list shown in the screenshot below. Once you’ve decided what to sync, it’s all automatically available across devices, so long as you sign in with the same Google account.
How to Backup Google Chrome Manually
If you don’t like the idea of having all your information be kept by Google, you can also backup the Chrome browser manually. Do note, though, that this means some Google services — like saving payment information and the like — won’t be available to you, nor will you be able to recall saved passwords.
These instructions will let you protect everything stored in Chrome, but if you only want to backup Chrome bookmark.
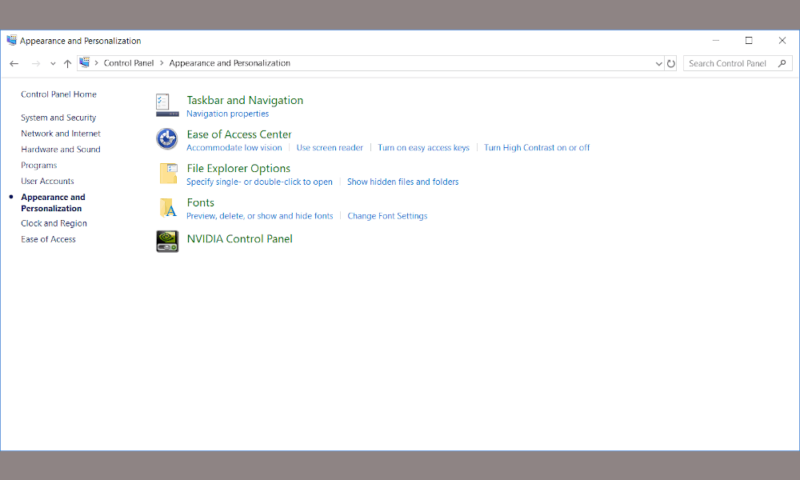
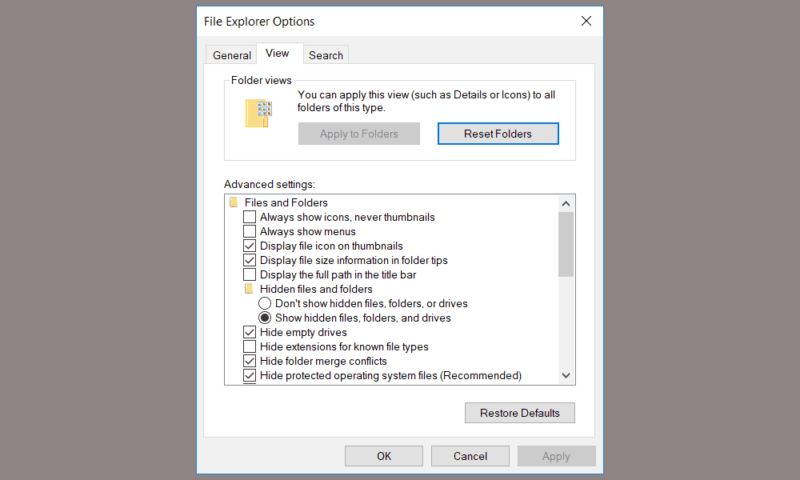
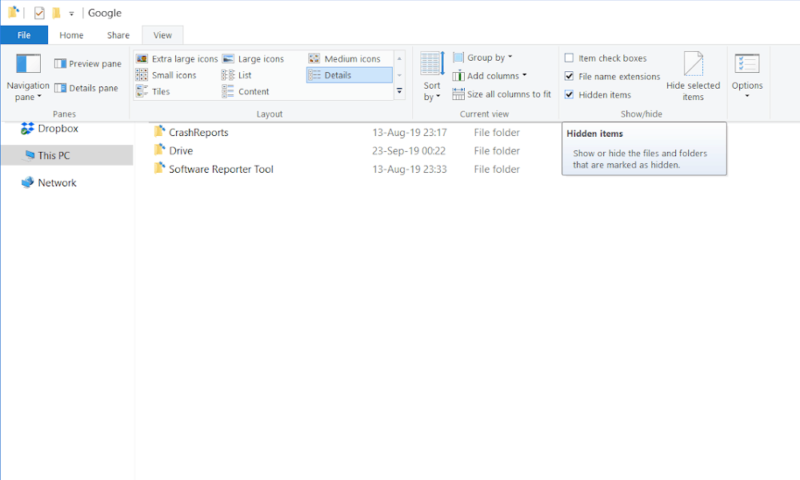
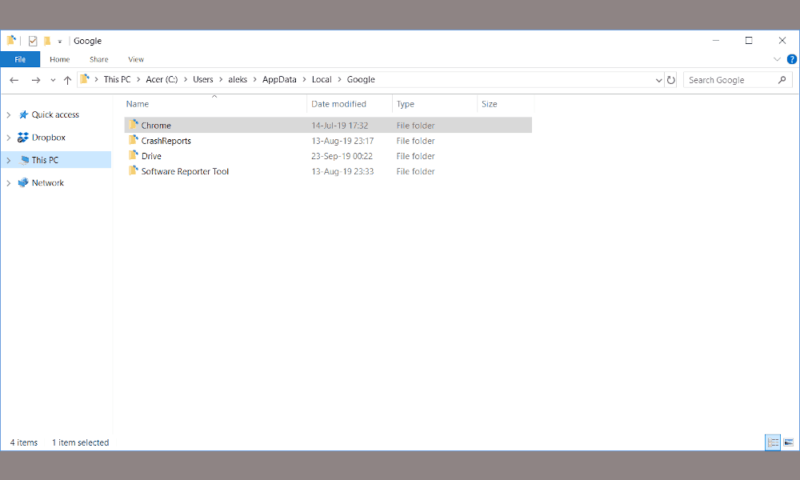
For the first step you’ll need to find the Chrome folder on your computer. The exact location can vary depending on your operating system, but by default, the folders can be found in the following places:
- On computers running Windows 7 and above: C:\Users\<username>\AppData\Local\Google\Chrome\User Data\Default
- On computers running Windows XP: C:\Documents and Settings\<username>\Local Settings\Application Data\Google\Chrome\User Data\Default
- On macOS X devices: Users/<username>/Library/Application Support/Google/Chrome/Default
- On Linux machines: Linux: /home/<username>/.config/google-chrome/default
Remember that you’ll need to replace the “<username>” parts of the paths with your own username.
Step by Step: How to Manually Backup Google Chrome
- Find the Chrome Folder on Your Computer
First, you’ll have to track down your Chrome profile folder stored locally on your device.
- Copy the Folder Into a New Location
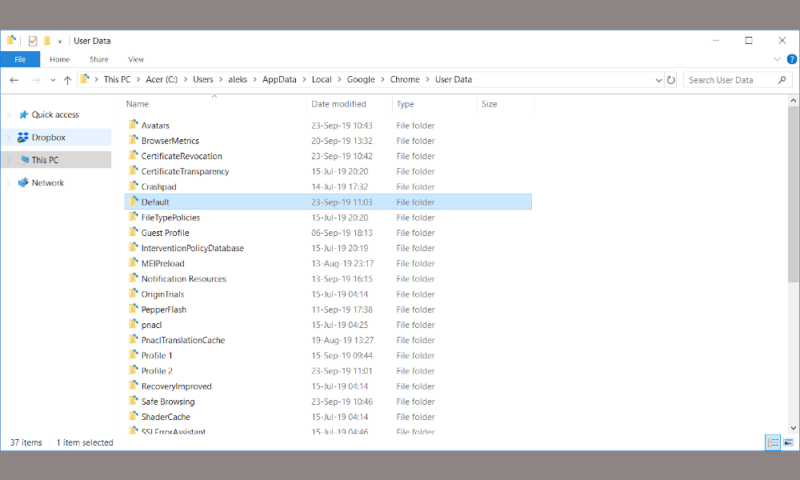
If you only have one user profile, you’ll find it in the folder called “default.” Simply copy this folder to your backup location — whether that’s on an external device or in the cloud — and you’ll have everything you need to restore Chrome to normal in the future.
- Backing Up Multiple Folders
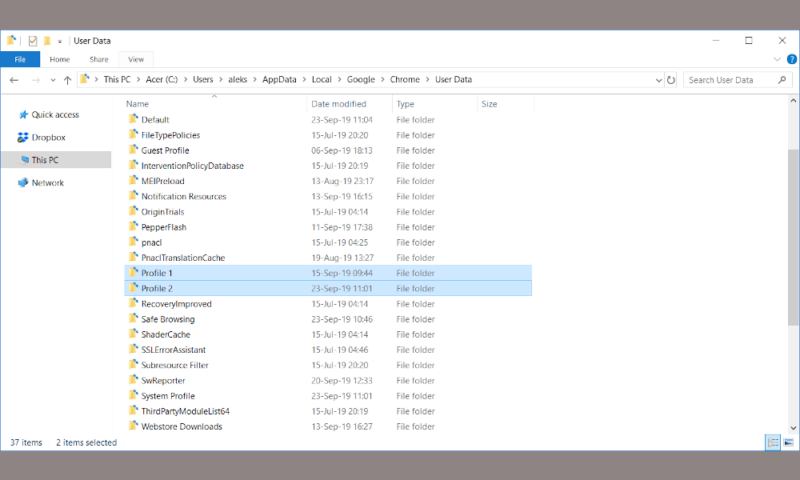
If you have more than one profile, it’s a little more confusing. Every profile after your first one is placed in a folder named “ProfileX” where “X” is a number that increases for each profile you create. Thus, your second profile folder (remember, your first is called “default”) will be named “Profile1,” your third will be “Profile2” and so on.
- Make Sure to Backup All Folders
If you’re backing up one of these profiles and not the default one, you will still need the latter to backup your extensions. This is because extensions are shared between profiles and are only stored in the default folder. That’s why we recommend backing up the default profile and any additional profiles you may have at the same time.
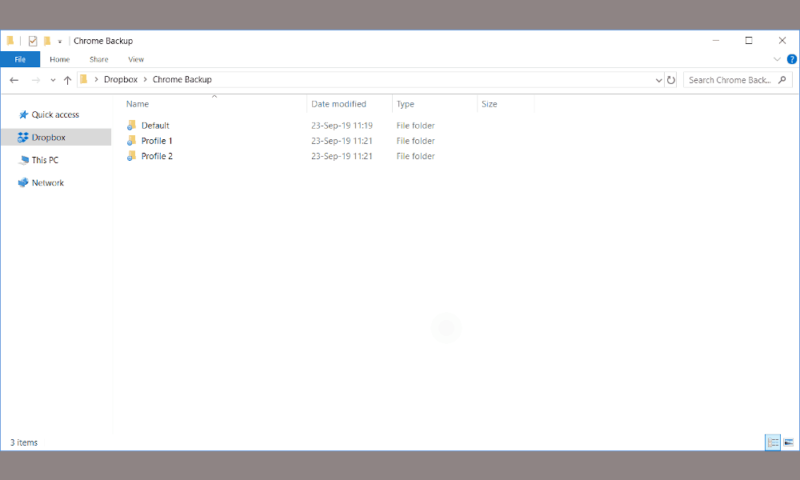
Because the user profiles can store quite a lot of data, the copy might take a long time to finish. Remember to close Chrome completely beforehand, or the process will abort due to the files being in use.
How to Restore Google Chrome User Data
When the time comes to restore your user profile in Google Chrome, the way to do this depends on how you backed up your data. If you used your Google account, the process is as simple as logging in with your new browser installation, and Chrome will automatically download all the data you backed up.
In the future, if you want to make Google forget what it knows about you, you can follow our guide on how to erase your Google history. Google claims this will delete all the information it has stored on you, but given the company’s less-than-stellar record on privacy, it’s hard to trust it on this.
If you manually backed up your profile, you need to navigate to the same folder as described above in the “manual backup” section. Once there, rename the “default” folder to something else, such as “defaultOLD,” and then paste your backed-up folder in the same location. The next time you start Chrome, you will be automatically signed into your recovered profile.
How to Export Google Chrome Bookmarks
Although you should be able to access all of your bookmarks from any device as long as you use the same Gmail account to log into Google Chrome, sometimes you may want to use a completely different browser or have a separate Gmail account. In this case, you can take your bookmarks with you by exporting them from Google Chrome. Here’s how to export your Chrome bookmarks to your device.
- Open Google Chrome and Click Settings
Open your Chrome settings by clicking on the on the three-bar settings icon.
- Hover Over the Bookmarks Option
Move your cursor over the “Bookmarks” option — a new menu will appear.
 Millennials are the largest age group of identity theft victims.
 - Choose “Bookmark Manager”
In the new menu, click on the “Bookmark Manager” button.
 Bank and fintech were the largest industry victims of identity theft.
 - Click the Three-Bar Settings Button
Next, you need to click on the settings button — but keep in mind this is not the same settings button you clicked before. There is another settings button just underneath it, like in the picture.
 Identity theft leads to financial losses.
 - Click on “Export Bookmarks”
Finally, select the “Export Bookmarks” option and choose a folder where you want to download your bookmarks. And that’s it — your bookmarks are now ready to be imported to another Gmail account or another browser.
 Understandably, the longer people have to deal with identity theft, the more upset they are.
Final Thoughts
Although Chrome certainly isn’t perfect — especially given the privacy concerns surrounding it — its ability to quickly sync your information between devices is a huge upside to the world’s most popular web browser. If you’re not a fan of its syncing capabilities though, you can check out our guide on how to turn off sync on Google.
Even if you don’t want to use a Google account in order to limit what Google knows about you, backing up Chrome is still incredibly easy, requiring just a few simple steps to accomplish.
However, all this does nothing to protect you against Chrome’s biggest flaw — privacy, or rather the lack of it — so make sure to download the best VPN for Chrome and read our anonymous browsing guide while you’re here. If you have a Chromebook, be sure to read our best VPN for Chromebooks guide, too.
What do you think of Chrome’s backup process? Do you agree that it’s quick and simple, or would you prefer a more straightforward way of backing up without using a Google account? Let us know in the comments below. Thank you for reading.
FAQ
-
Either by syncing your account with Chrome or manually backing up your Chrome data. There are instructions for both above.
-
The easiest way is to simply sync your Google account in Chrome on your old device and then log in to your new computer with that account.
-
Either by syncing your Google account with Chrome or manually moving the respective folder on your hard drive.
The post How to Backup Google Chrome: A Guide for 2024 appeared first on Cloudwards.

